Scrapbooking

Cuteness Documented

Hi guys! I’m sorry I’ve been MIA these past couple of weeks. My husband recently started taking evening classes which means I have to cook for myself… Yes, I eat a lot of frozen pizzas and nachos but I try to cook dinner here and there plus I’ve been trying to clean a little more than I usually do, all because I’m so proud of the hubby and I want him to feel like I can hold down the fort… sometimes. Plus I’ve been taking care my four-legged and web-toed kids, and aside from that I’ve been catching up on all my bad reality TV shows. So again, I’m sorry and I will try my best to not let it happen again!

I made a very quick scrapbook layout with the Instagram picture I took of Lucky when we first got her (I can’t help but “Aww!” when I see this pic). I cut down a white 8.5×11 paper down by half an inch on 3 sides and adhered that to a colorful ombre background from Craft Smith. Because of the colorful background, I chose to use black and white accents.DSC02877I am loving parcel tags right now so I decided to type on one to add a little journaling. DSC02881I finished the layout with a little sewing on the edges and by stamping the bottom edge with one of Kellie’s Stamps. I added some washi tape and a cool Jodie York flair button (which I’m also loving right now) from Scrapbook and More.

Thanks for stopping by, see you next time (soon)!

Some items used:

Scrapbooking

Smile #Goodtimes

Hi guys! Today I’m sharing a scrapbook layout I made and it’s my first time doing an 8.5 x 11 page. I usually do 12 x 12 pages but I recently discovered these smaller pages and I love how they look. Most of the layouts that draw my attention are simple and clean looking so that’s the look I went for on this page.

I found some pictures I took on a family trip to Chama, New Mexico in 2013. I had taken these pictures of AJ outside of our cabin with the continuous shooting mode on my Sony camera.

Smile #Goodtimes 1I decided to go for a geometric-type layout because those type of designs really catch my eye. I created a simple layout in Adobe Photoshop because I wanted to plan it out first instead of just putting something together like I usually do.

Triangle Layout copy

Once I got the layout figured out, I cut out the triangles with my Cricut and added different background paper to each cut-out. I also used my Cricut to cut out the sentiment and I added some gold letter stickers and wood stars from Studio Calico.
Smile #Goodtimes 2

I typed out my “journaling” and cut it out in strips. At the end I added a couple of strips to the top of the page with my sewing machine since I had such a big empty space at the top.Smile #Goodtimes 3

I really love how the page came out and I think I am going to stick to these 8.5 x 11 pages from now on! I hope you guys enjoyed!

Supplies used:

Project Life

Project Life: June ’15

Hi there! So, I’m just going to go ahead and start by saying Project Life kicked my ass. I thought everything was going to come together for me easily, and some did, but I kept changing things and adding stuff here and there. I finally had to just realize this is going to be a learning process for me. I’m still trying to figure out my layout and journaling style, and on top of that, I’m trying to learn how to take better pictures and how to edit. I will say that I recently downloaded Adobe Lightroom and I just love it! I was scared I was going to be intimidated by it and not use it but when I found out you can download it for a free 30-day trial, I thought why not just try? I watched a couple of videos and played around with presets and I can’t imagine not using it ever! I also tried out printing my own photos and let’s just say my HP printer made it back into the inner circle with my Samsung Galaxy, iPod, and Sony camera. Speaking of my Galaxy, I’m also trying to perfect the cell phone selfie, so far it’s a big fat fail, or is it my face? But here I am, finally done with my June layout.

I found inspiration from A LOT of other “modern day memory keepers” but I still wanted to stay true to myself. And in true form, I was attracted to a lot of black and white. My layout ended up having a black/white/wood grain theme with green and yellow accents. I did not plan that ahead, I knew I wanted to incorporate Mama Elephant’s Lemon Grass ink in there somewhere, and that led to the accent colors.

DSC02782

DSC02788 DSC02789

Most of my pictures are from around the house. AJ and i went downtown so I could take pictures of random things to use as practice in Lightroom. Plus you can see one picture that was taken at work with my Samsung. So this layout is pretty much a normal “day in the life”.
DSC02799 DSC02800 DSC02801

I used a mixture of Studio Calico, Mama Elephant, Kellie Stamps, and Kelly Purkey for Hero Arts. I also used a Royal typewriter that was given to me by my friend Angela.

All in all, I’m happy with my layout and I’m glad I decided to take Project Life on. I hope you guys enjoyed!

My Favorites

June ’15 Top 5

Happy July everyone! I can’t believe half the year is gone! I just wanted to say thank you if you are a follower of The Lovely Pear, I just love where this blog is right now. I feel like my little blog has done awesome these past six months and I can’t wait to see how it will do the rest of the year! Now let’s start with June’s Top 5:

June Top 5

1. We R Memory Keepers Banner Punch Board
June Fave 1

We R Memory Keepers makes it on to the list for a second time in a row with this awesome punch board. I have made banners before where I had to insert one sheet of paper at a time into my die cutting machine in order to cut out each flag, so it felt like forever to cut out enough to spell out “Happy Birthday” (insert bored face emoticon). I knew I had to get this when a friend asked me to make a banner for her son’s birthday, and I couldn’t believe how fast it was to cut out each flag. I especially love how it makes three different styles, plus it is so simple to use. This is a must-have if you’re into throwing parties and love a good banner.

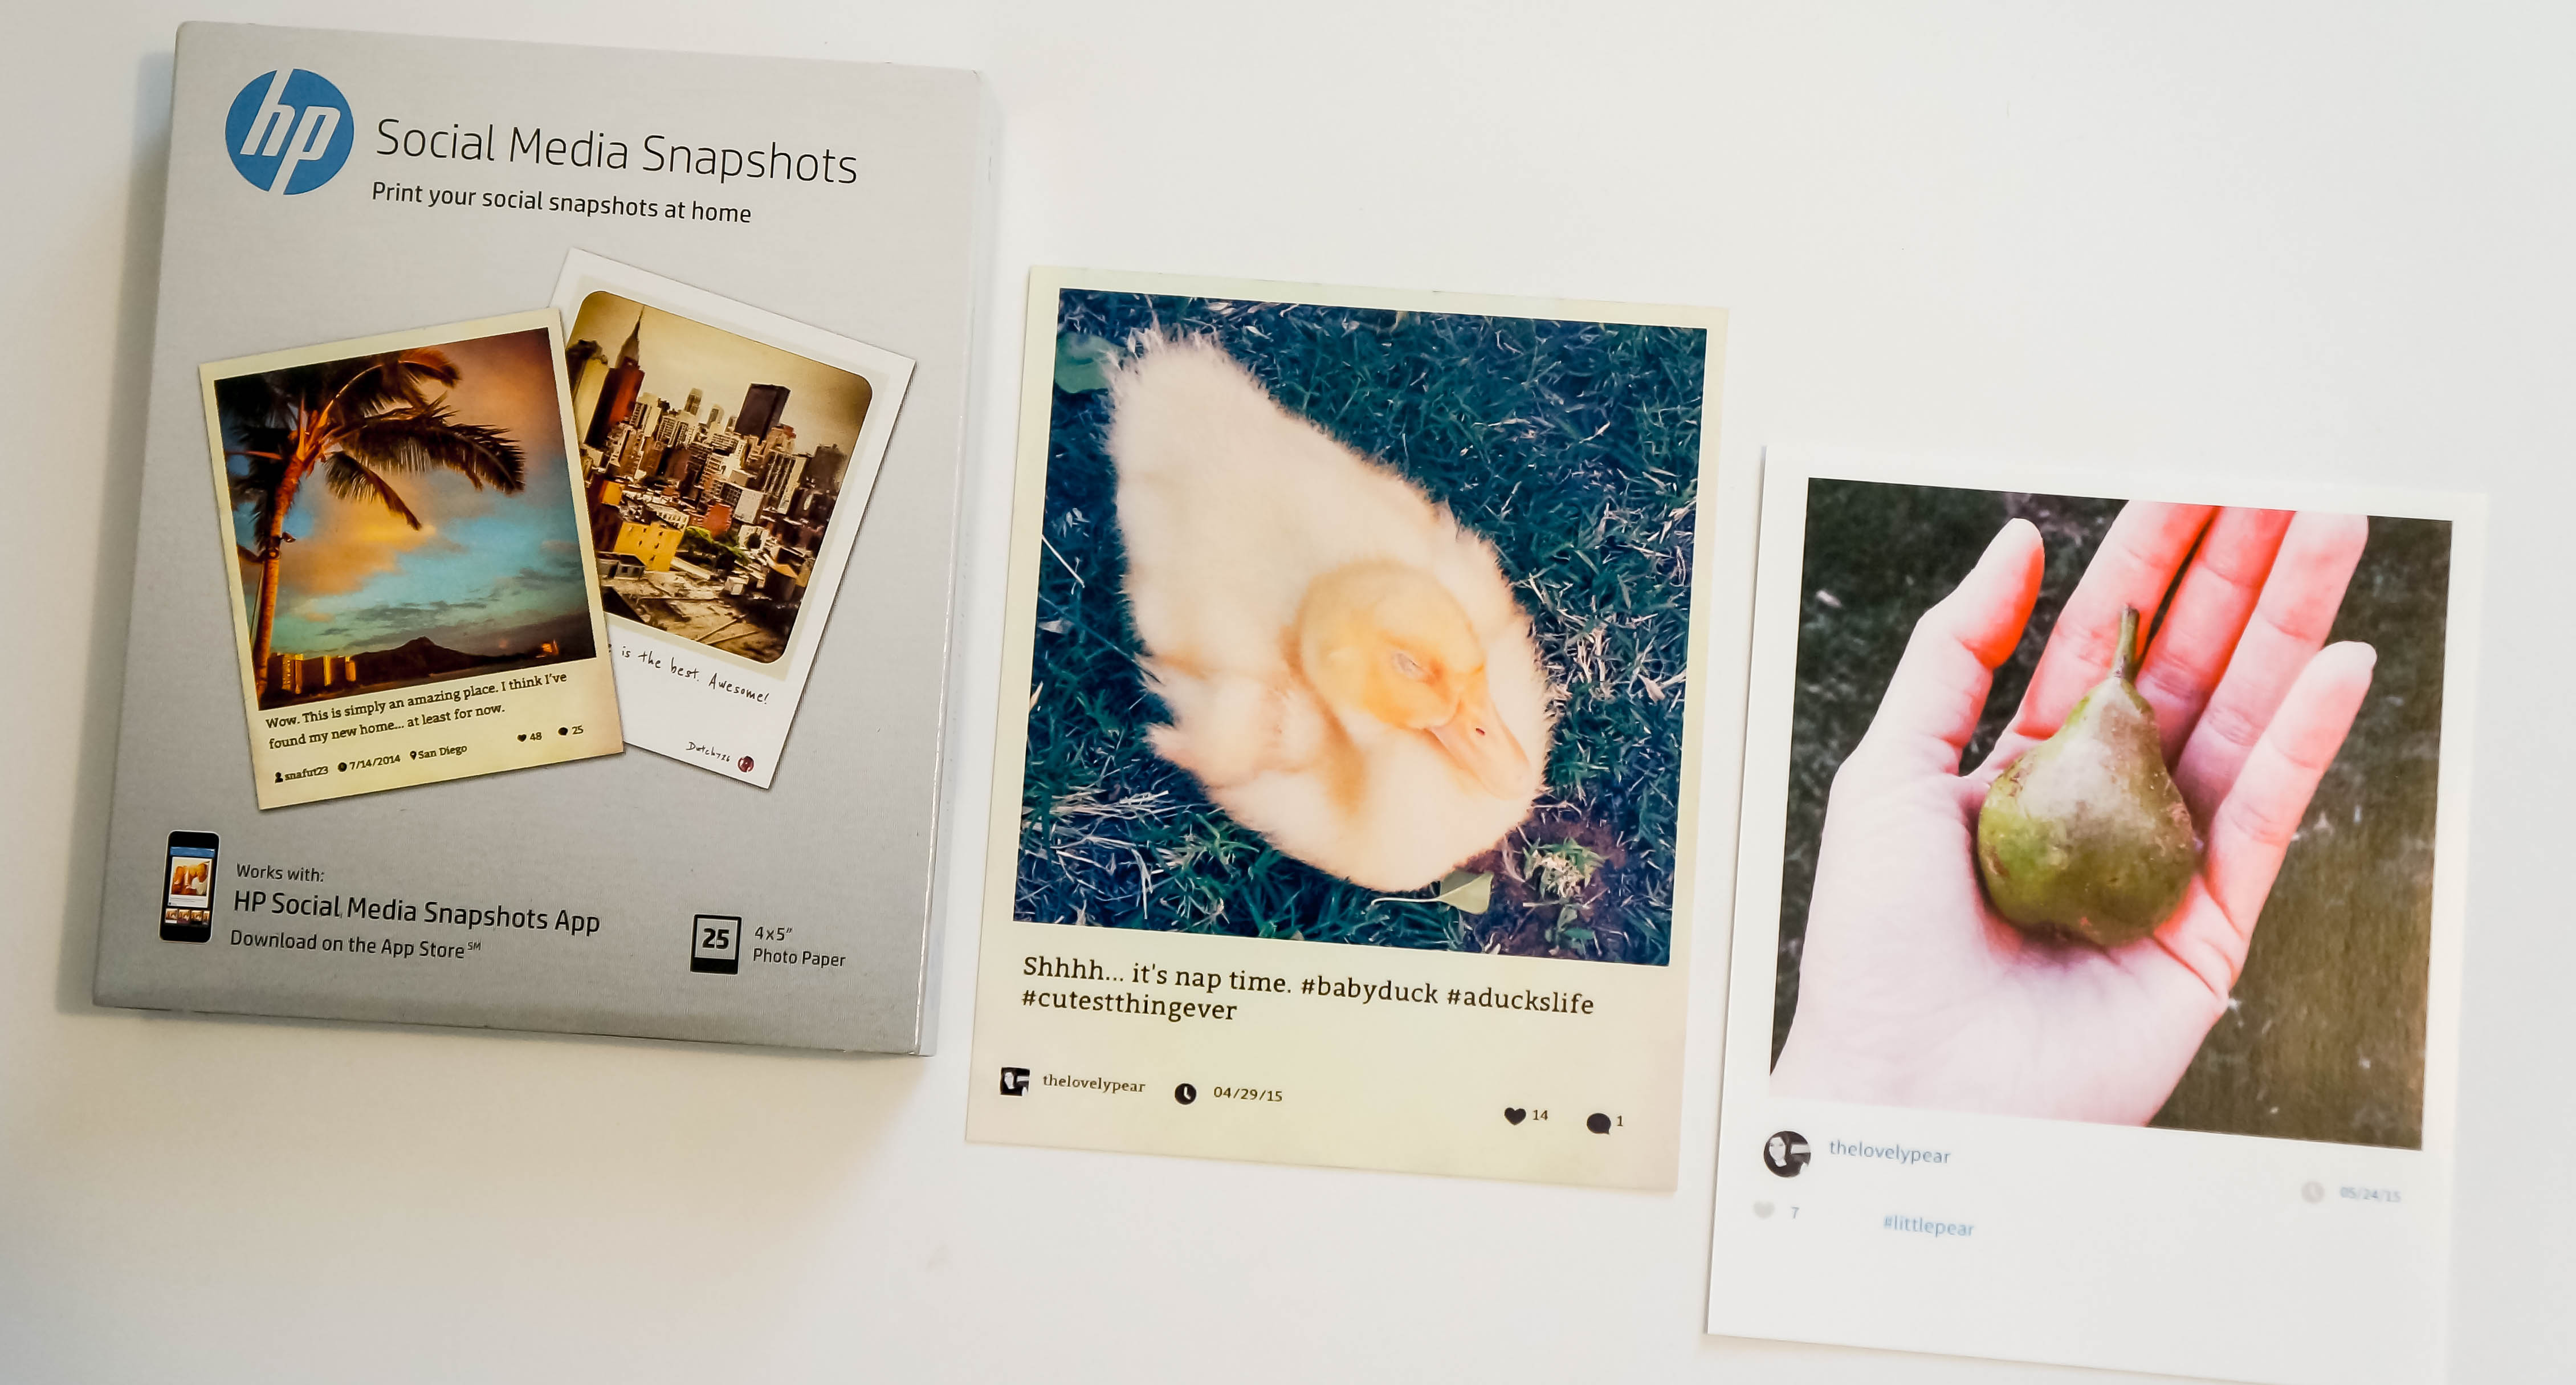
2. HP Social Media SnapshotsJune Fave 2

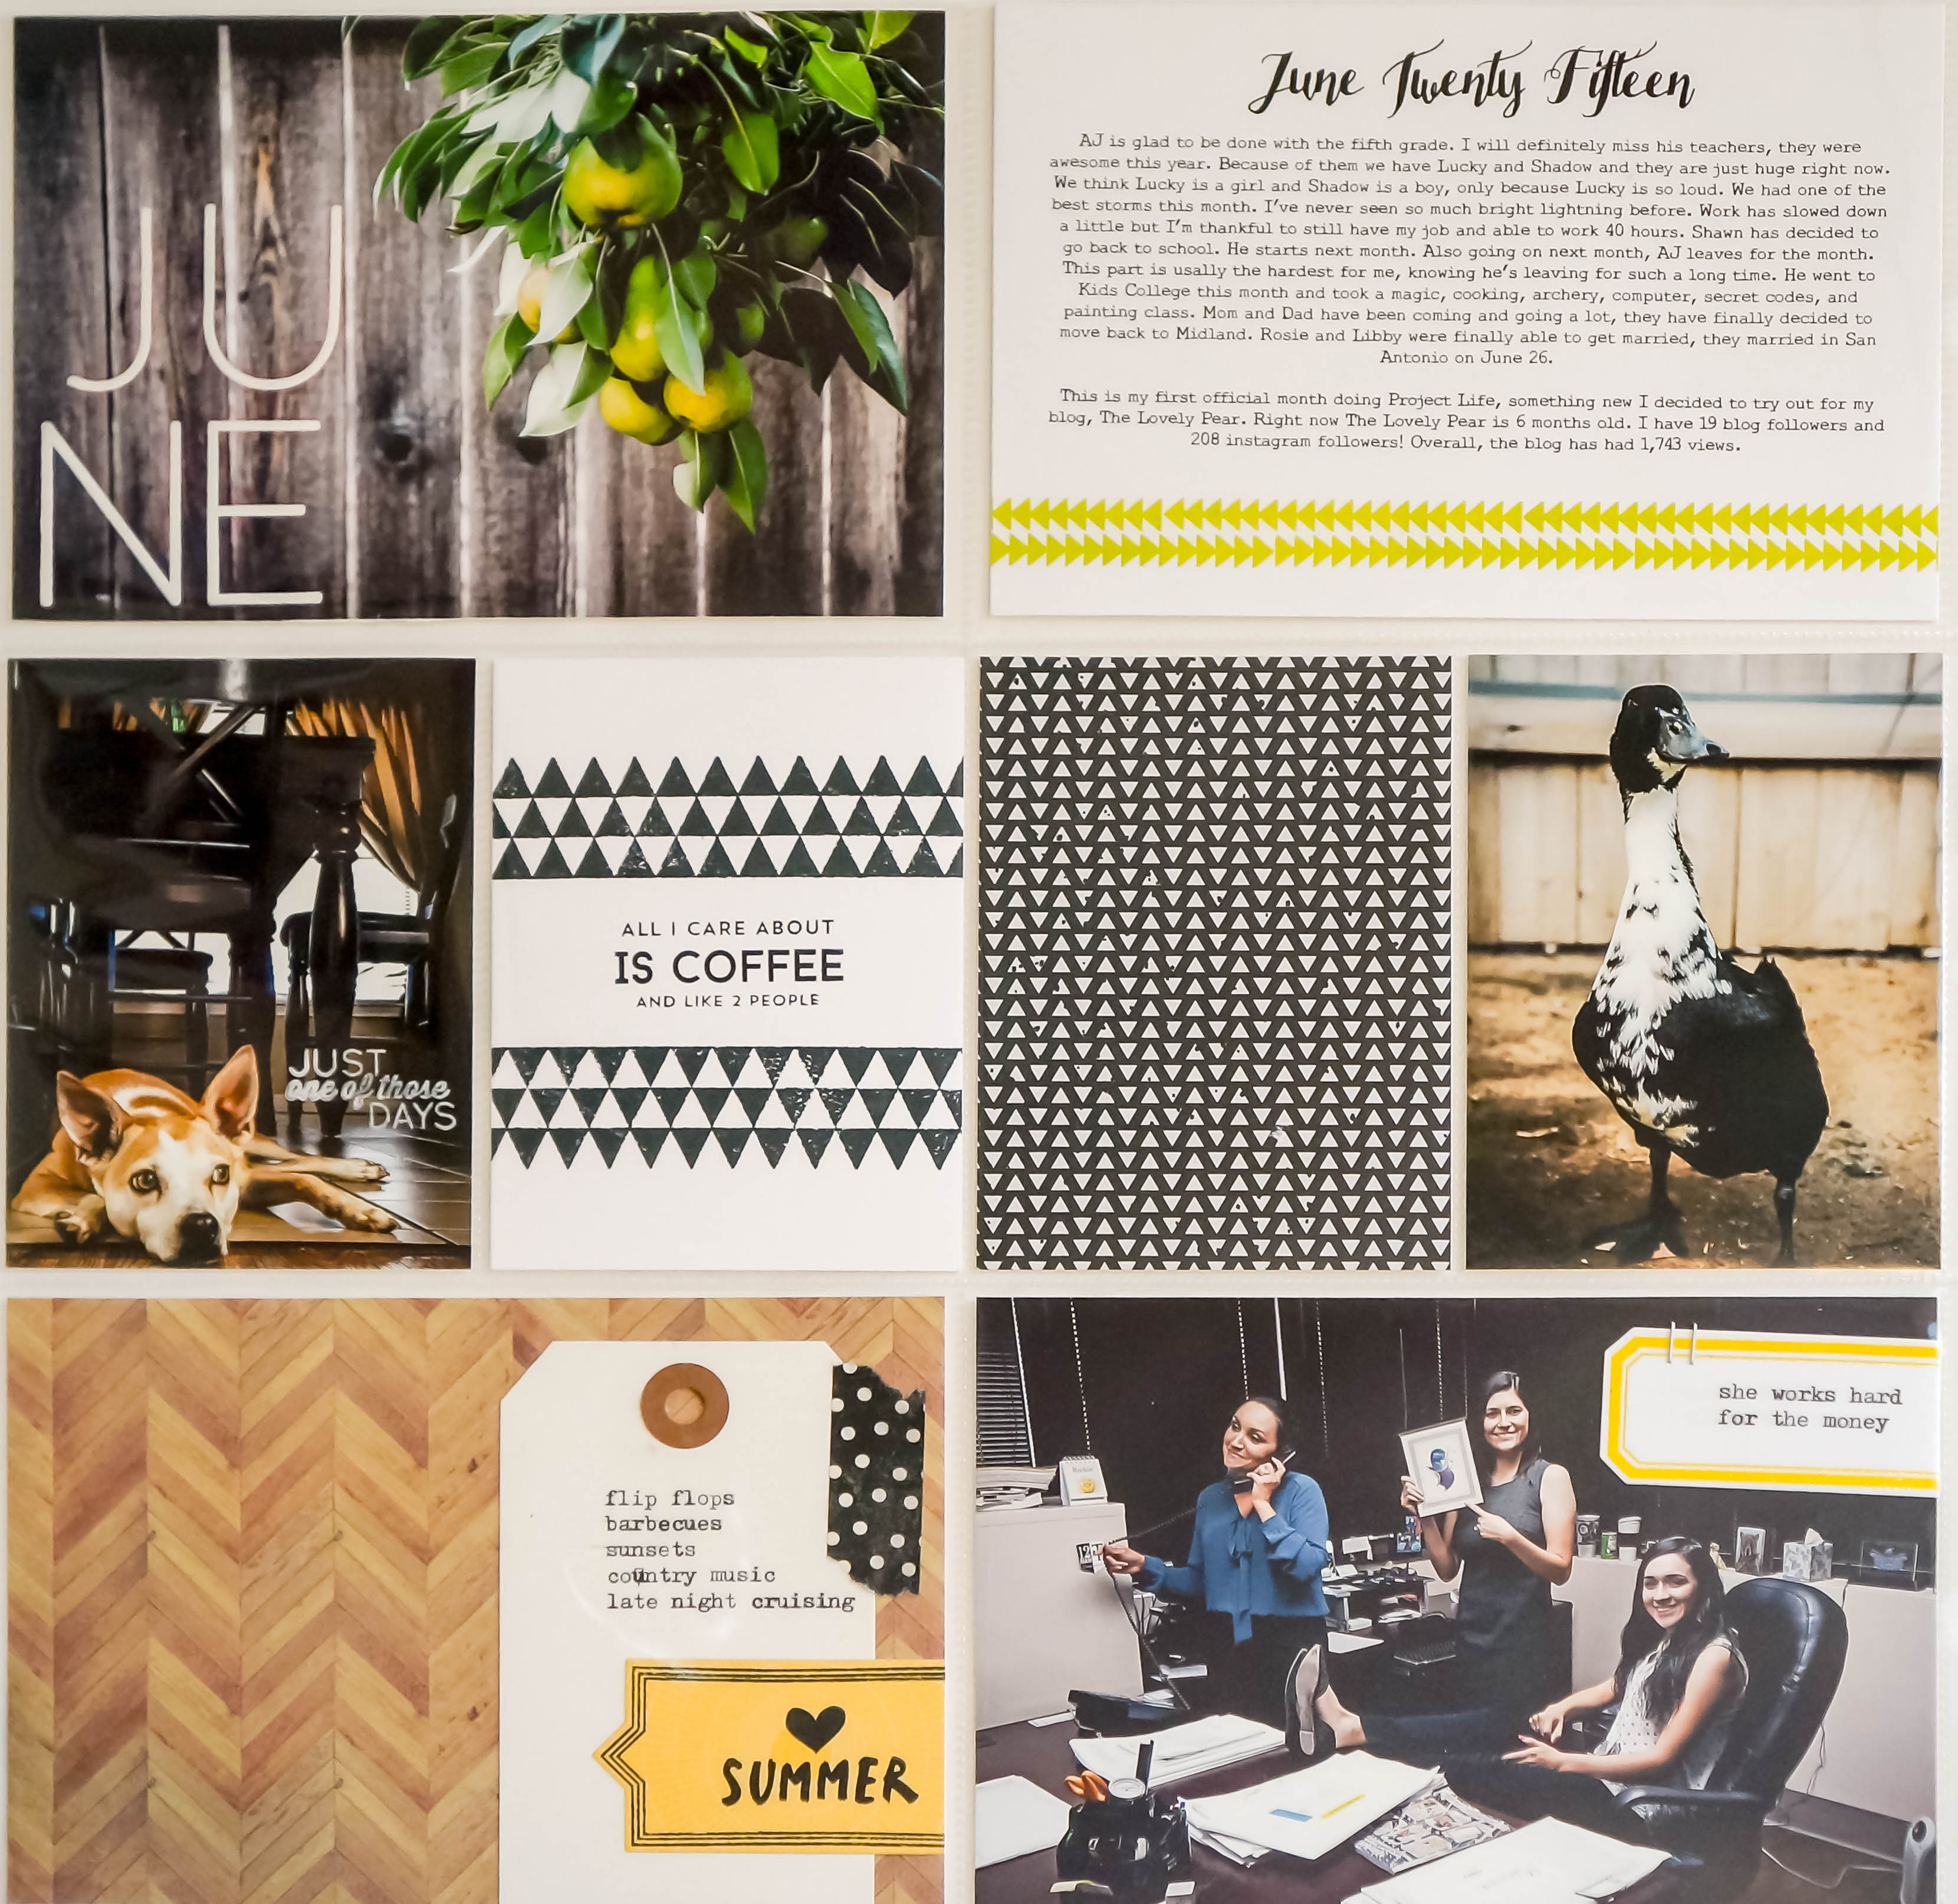
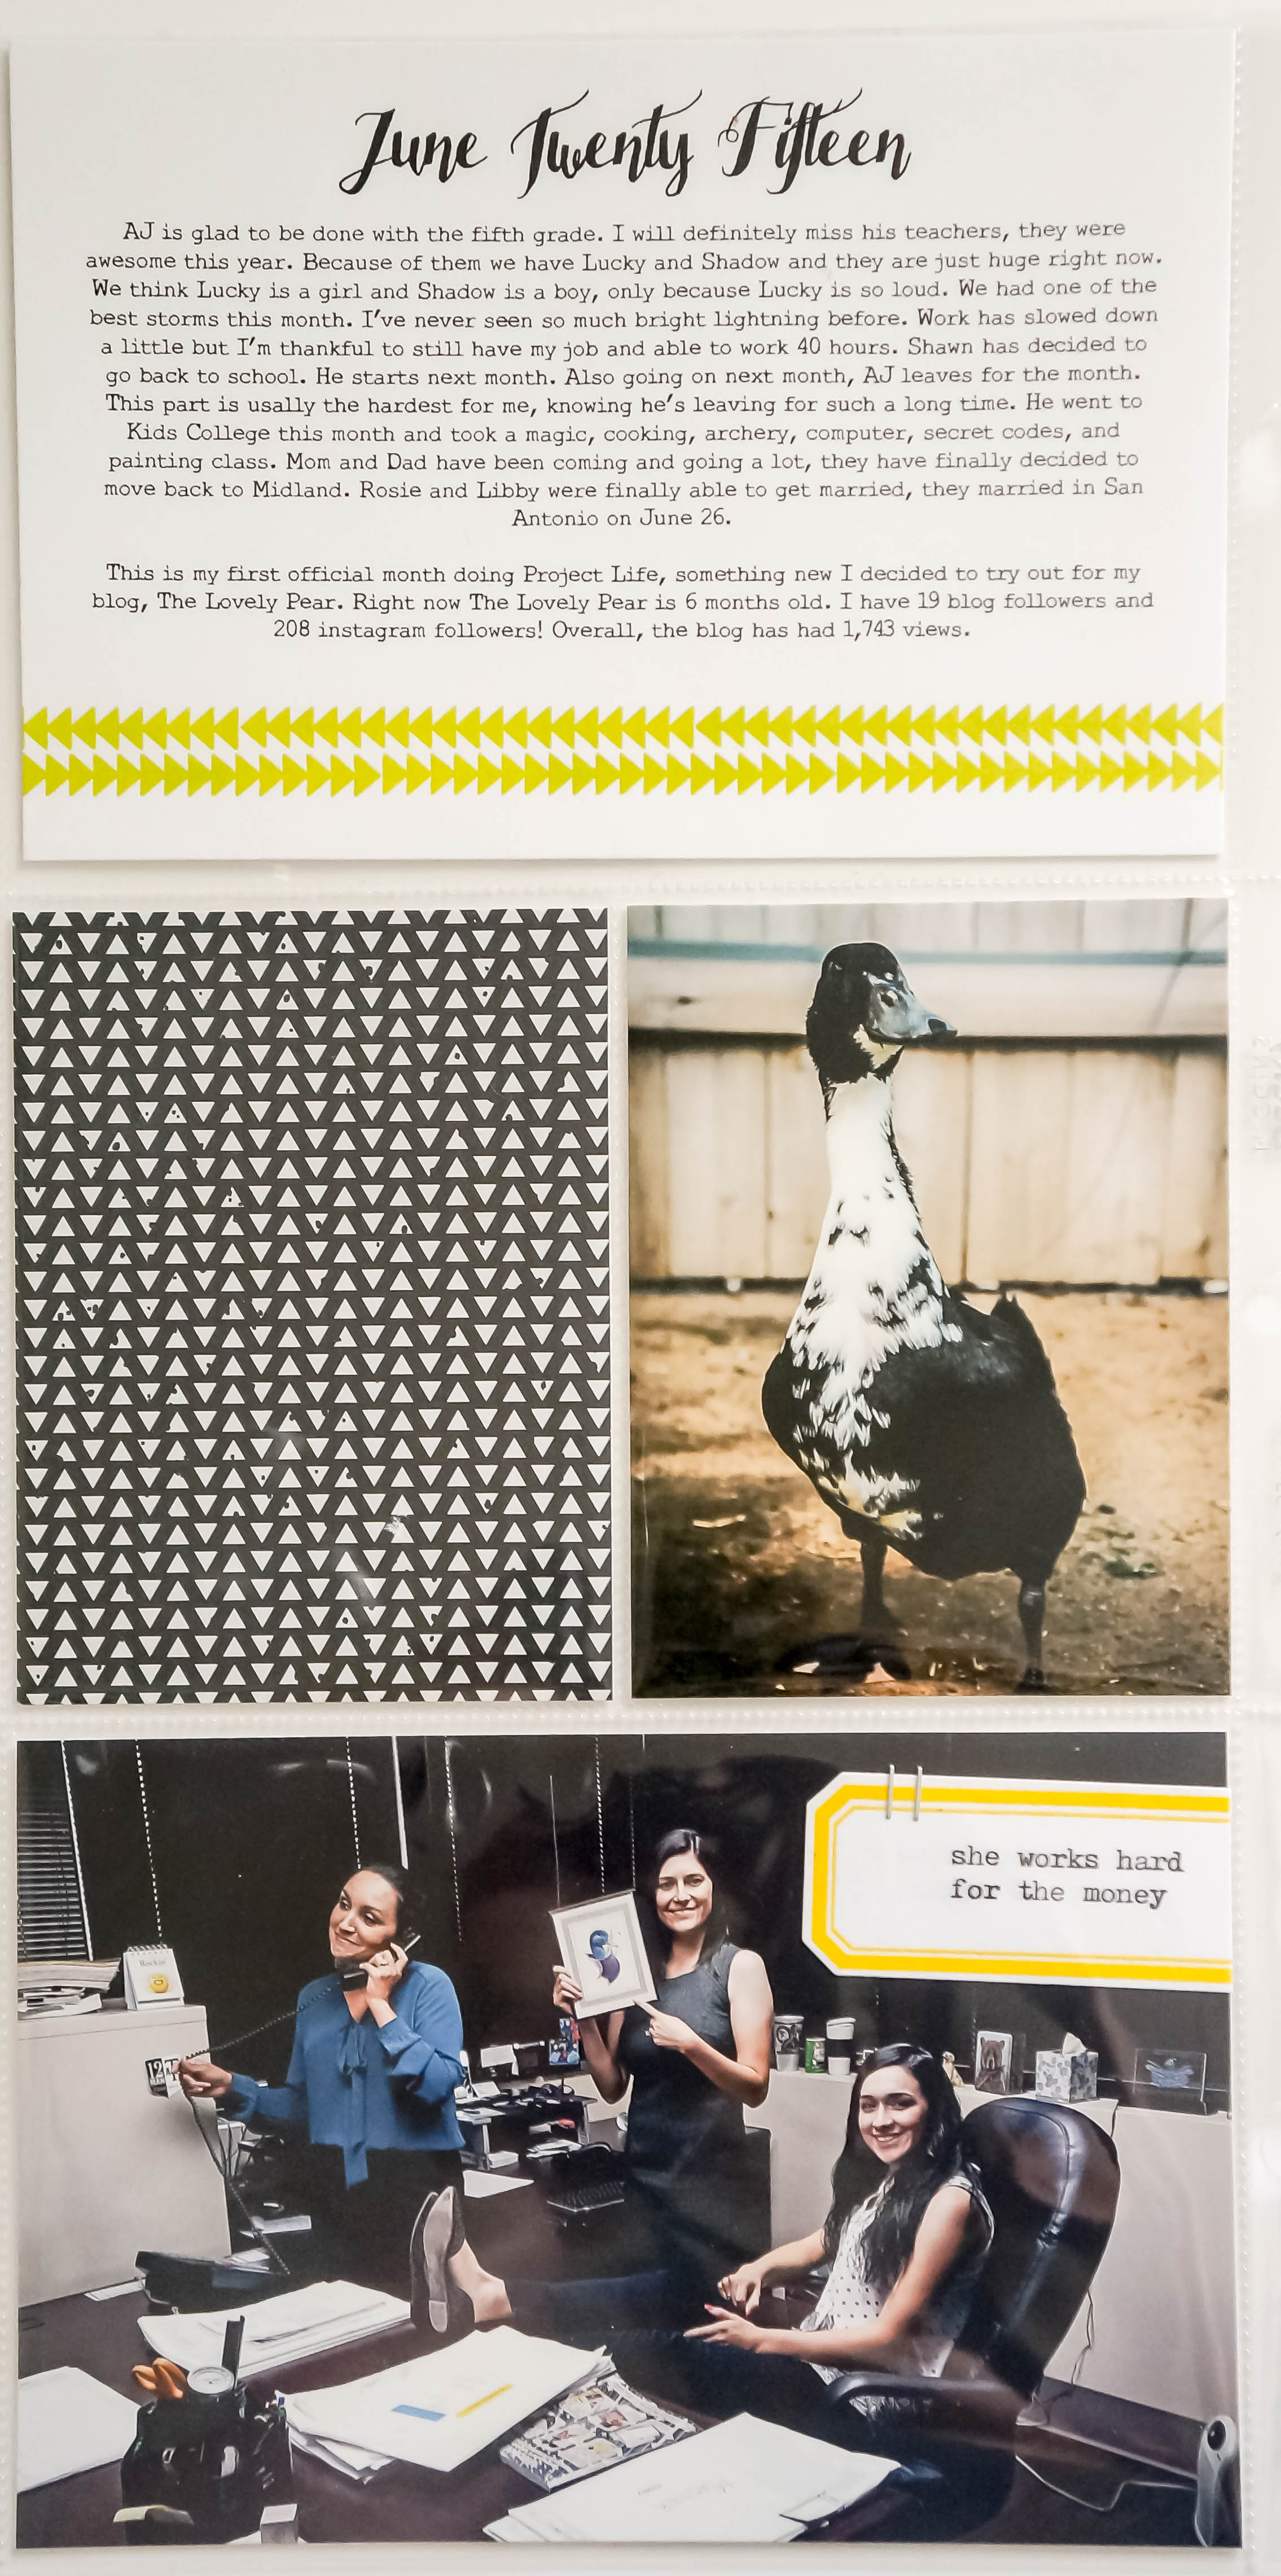
If you love Instagram as much as I do, then you HAVE to try this out! You buy this pack of HP photo paper, which is 25 sheets of 4×5 glossy paper, and you download the HP Snapshots app (only available on Apple App Store). Once you connect to your Instagram account and your HP printer, you can choose an Instagram photo and a template and you get this picture with your Instagram stats. You can have your photo caption, the date you posted it, your icon, and how many likes and comments your photo received printed. There are 11 different templates to choose from, including some that come with a black, green chevron, or pink border. The duck photo was printed with an antique looking template called “Dickens”. I think this would be perfect to use with Project Life or scrapbook layouts.June Fave 2a

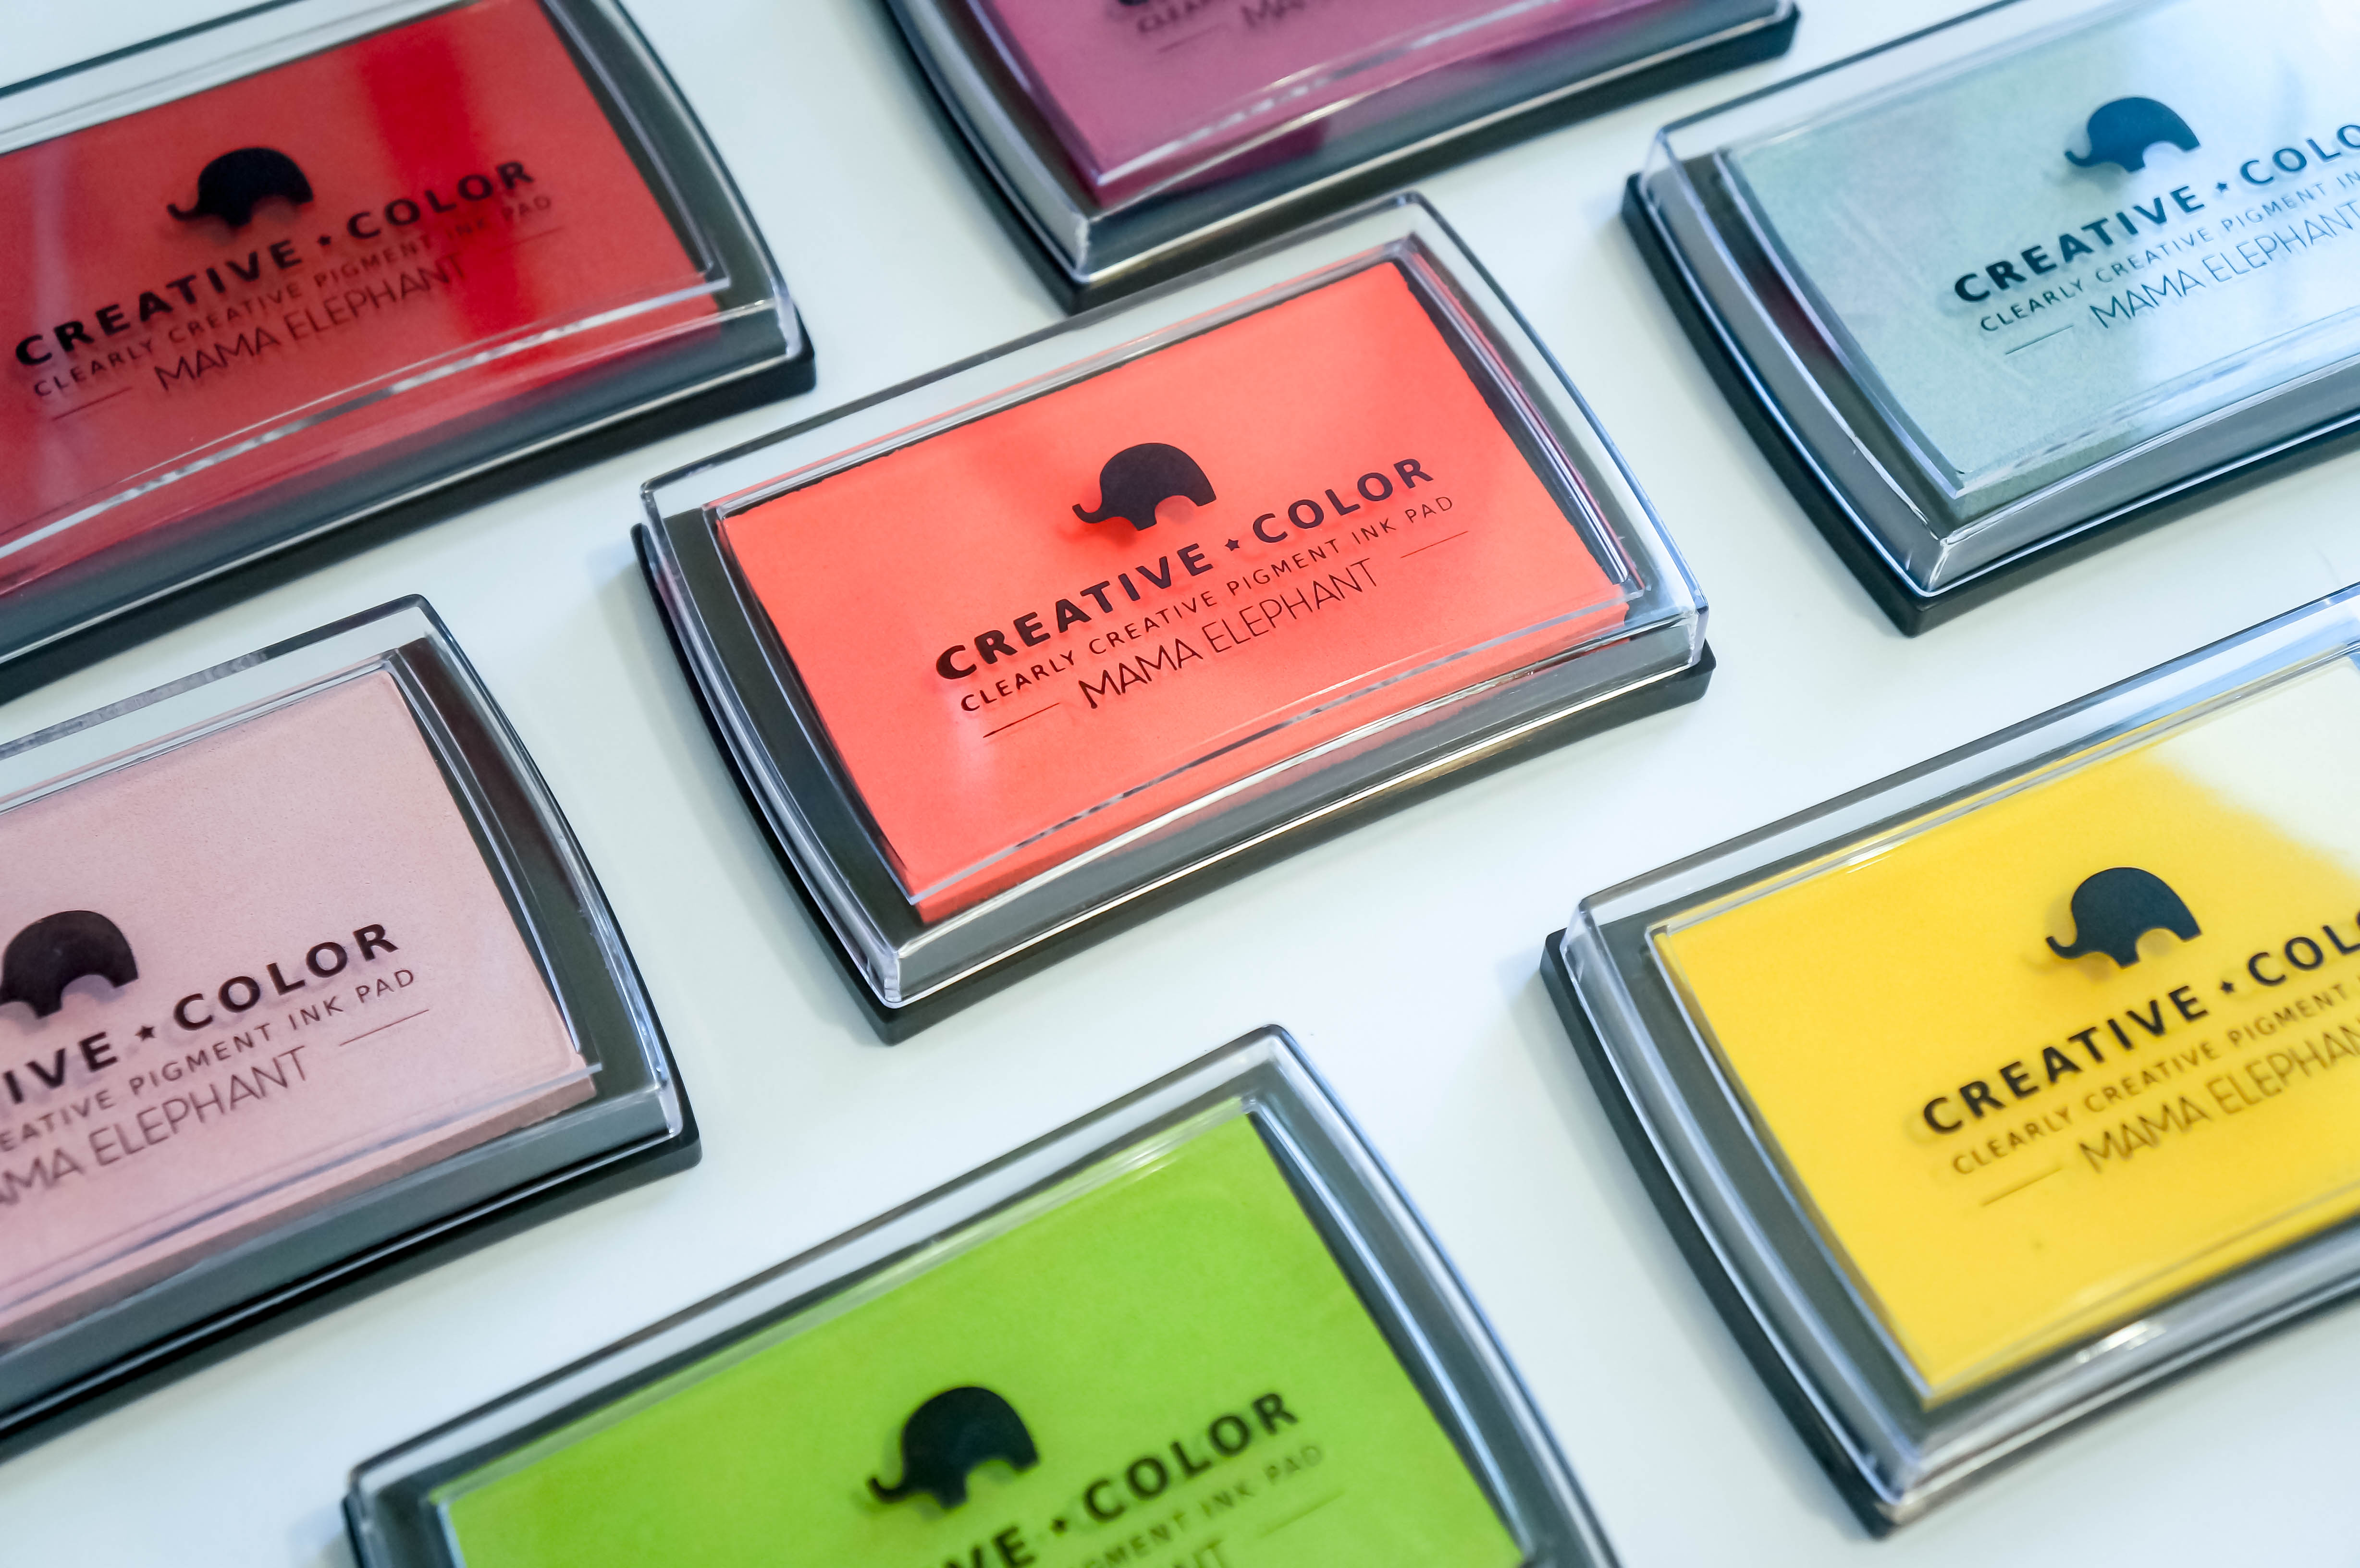
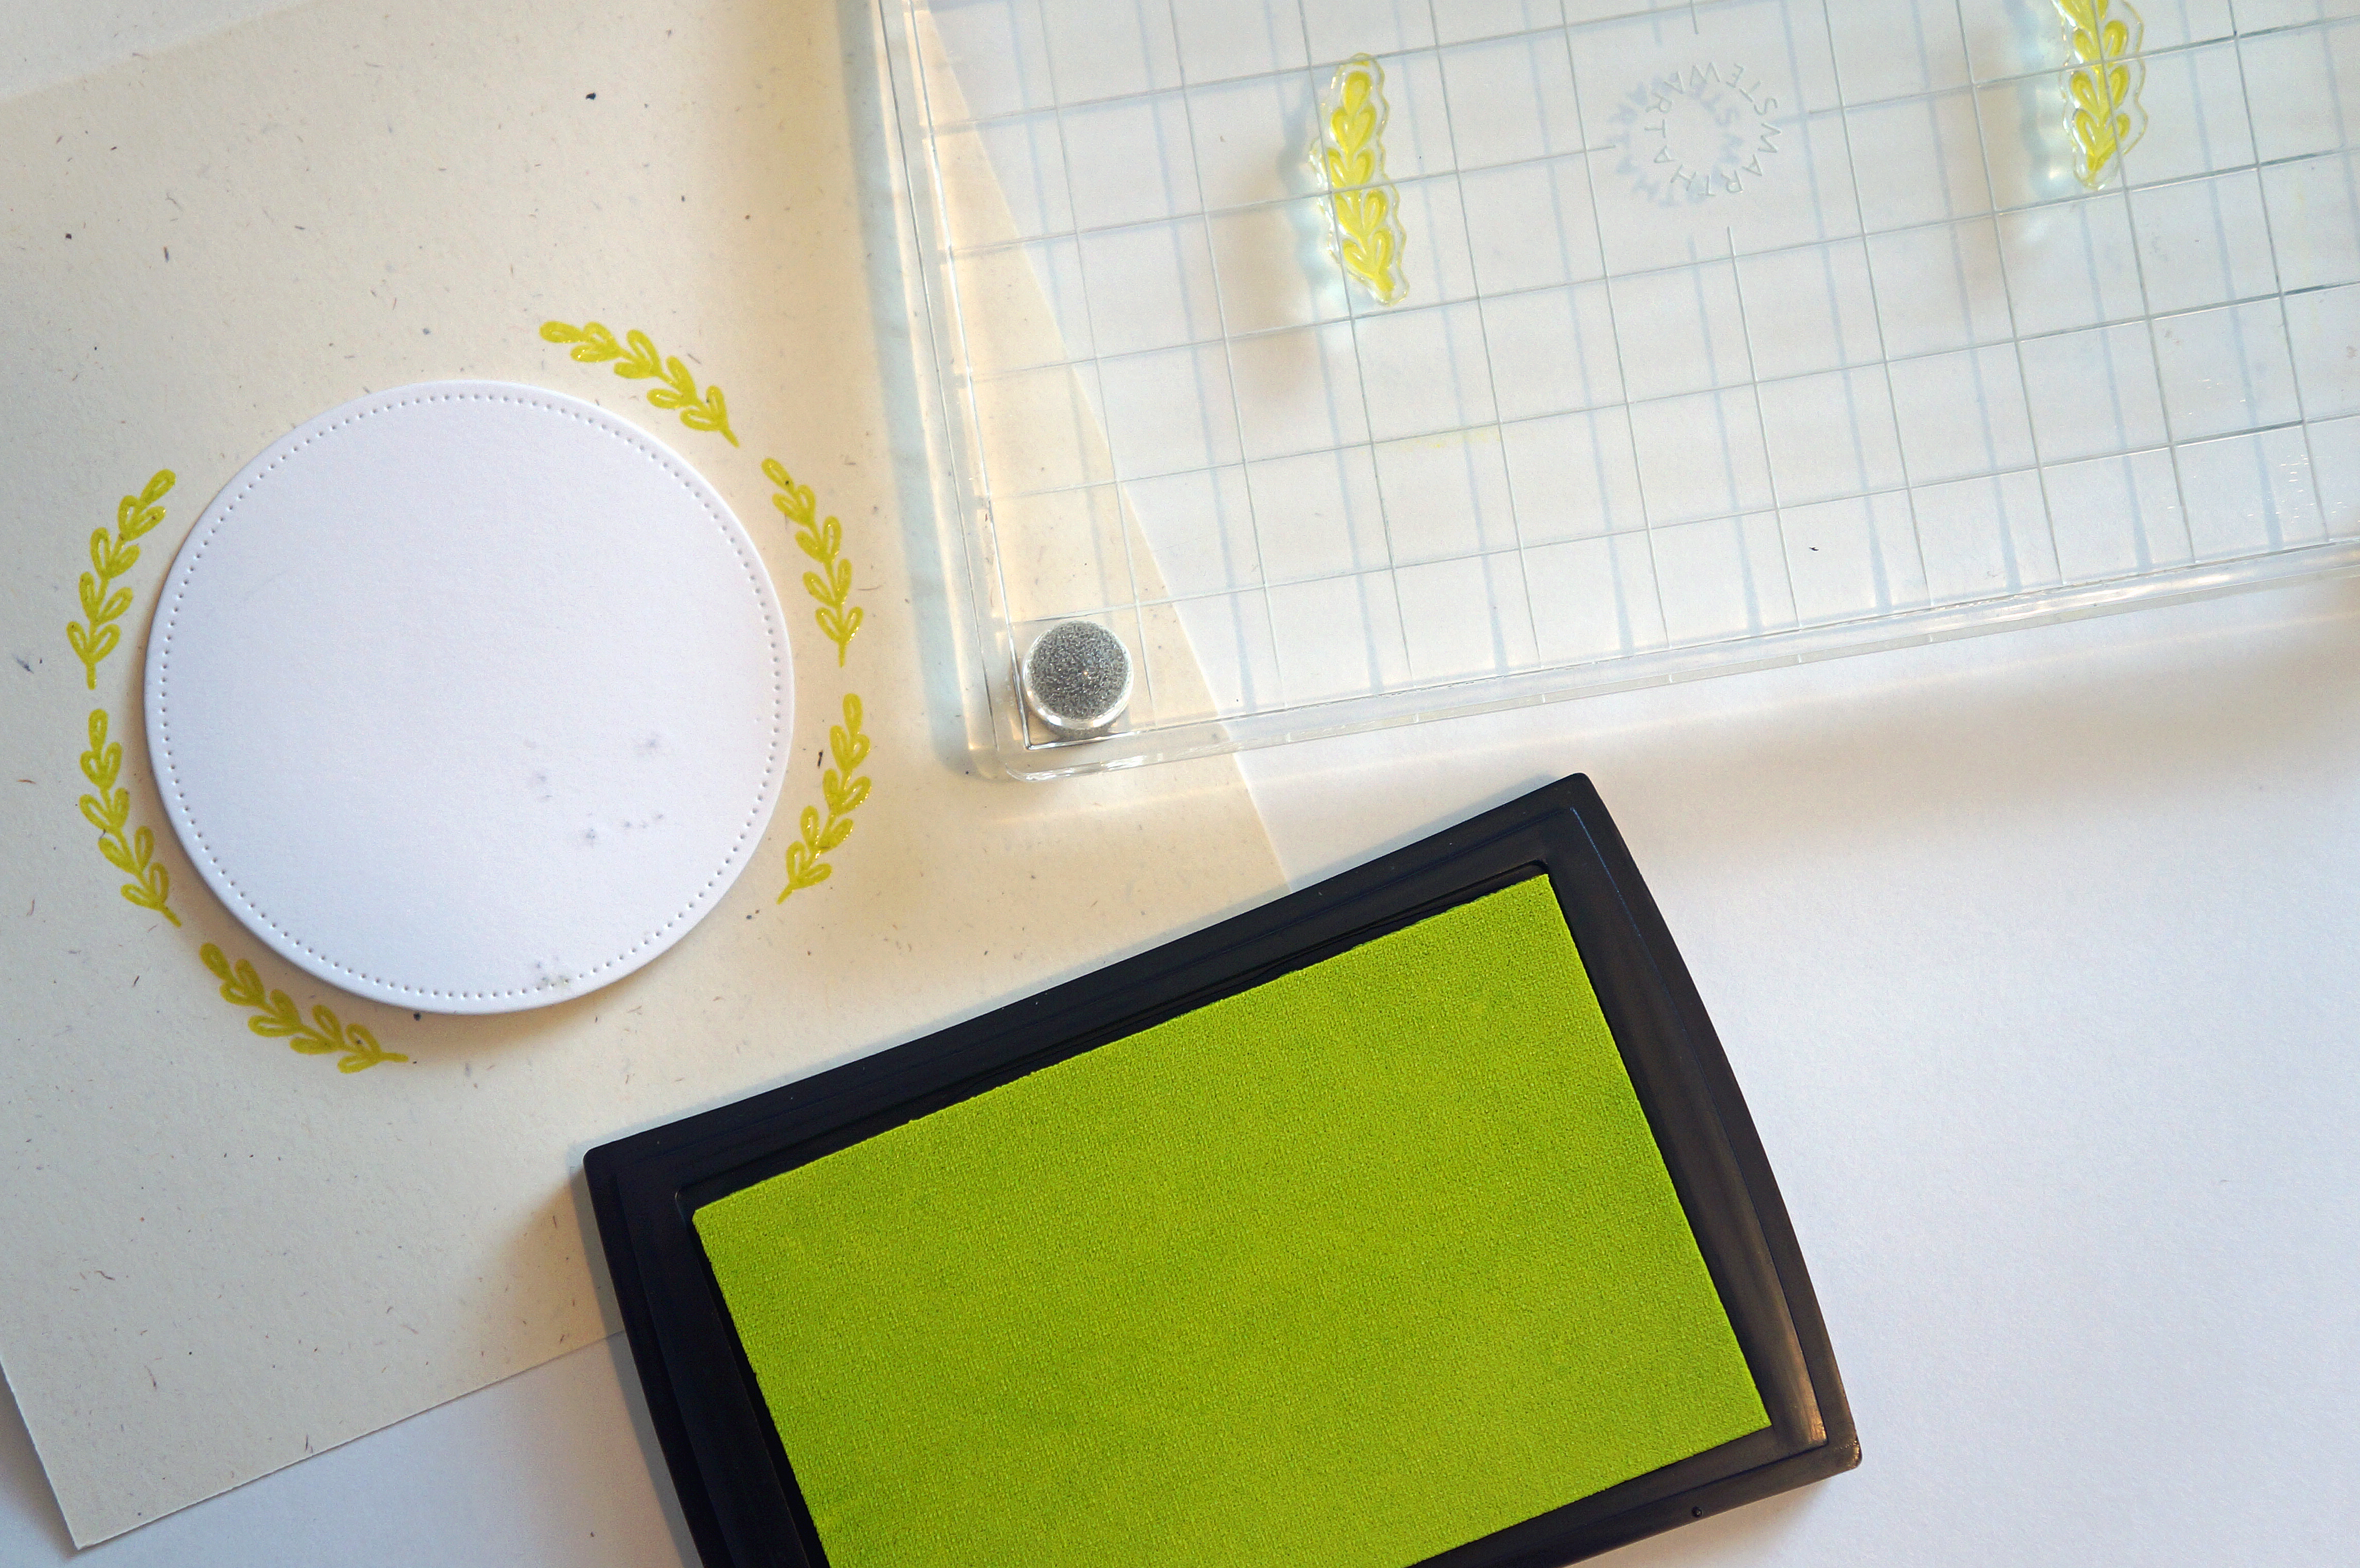
3. Mama Elephant Creative Color Pigment InkJune Fave 3

So, I’m cheating a little on this one. I have had one or two Mama Elephant ink pads for a while now but I really didn’t know how to work with pigment ink so I hardly used them. This month I decided to try again and now I only want to use this ink! I bought a lot of new colors this month and they are so vibrant and Mama Elephant has the best colors! I’m going through a Lemongrass phase right now but I just got Tutti Frutti in and I’m sure that will be the color for July. This is my favorite colored ink to use, period.

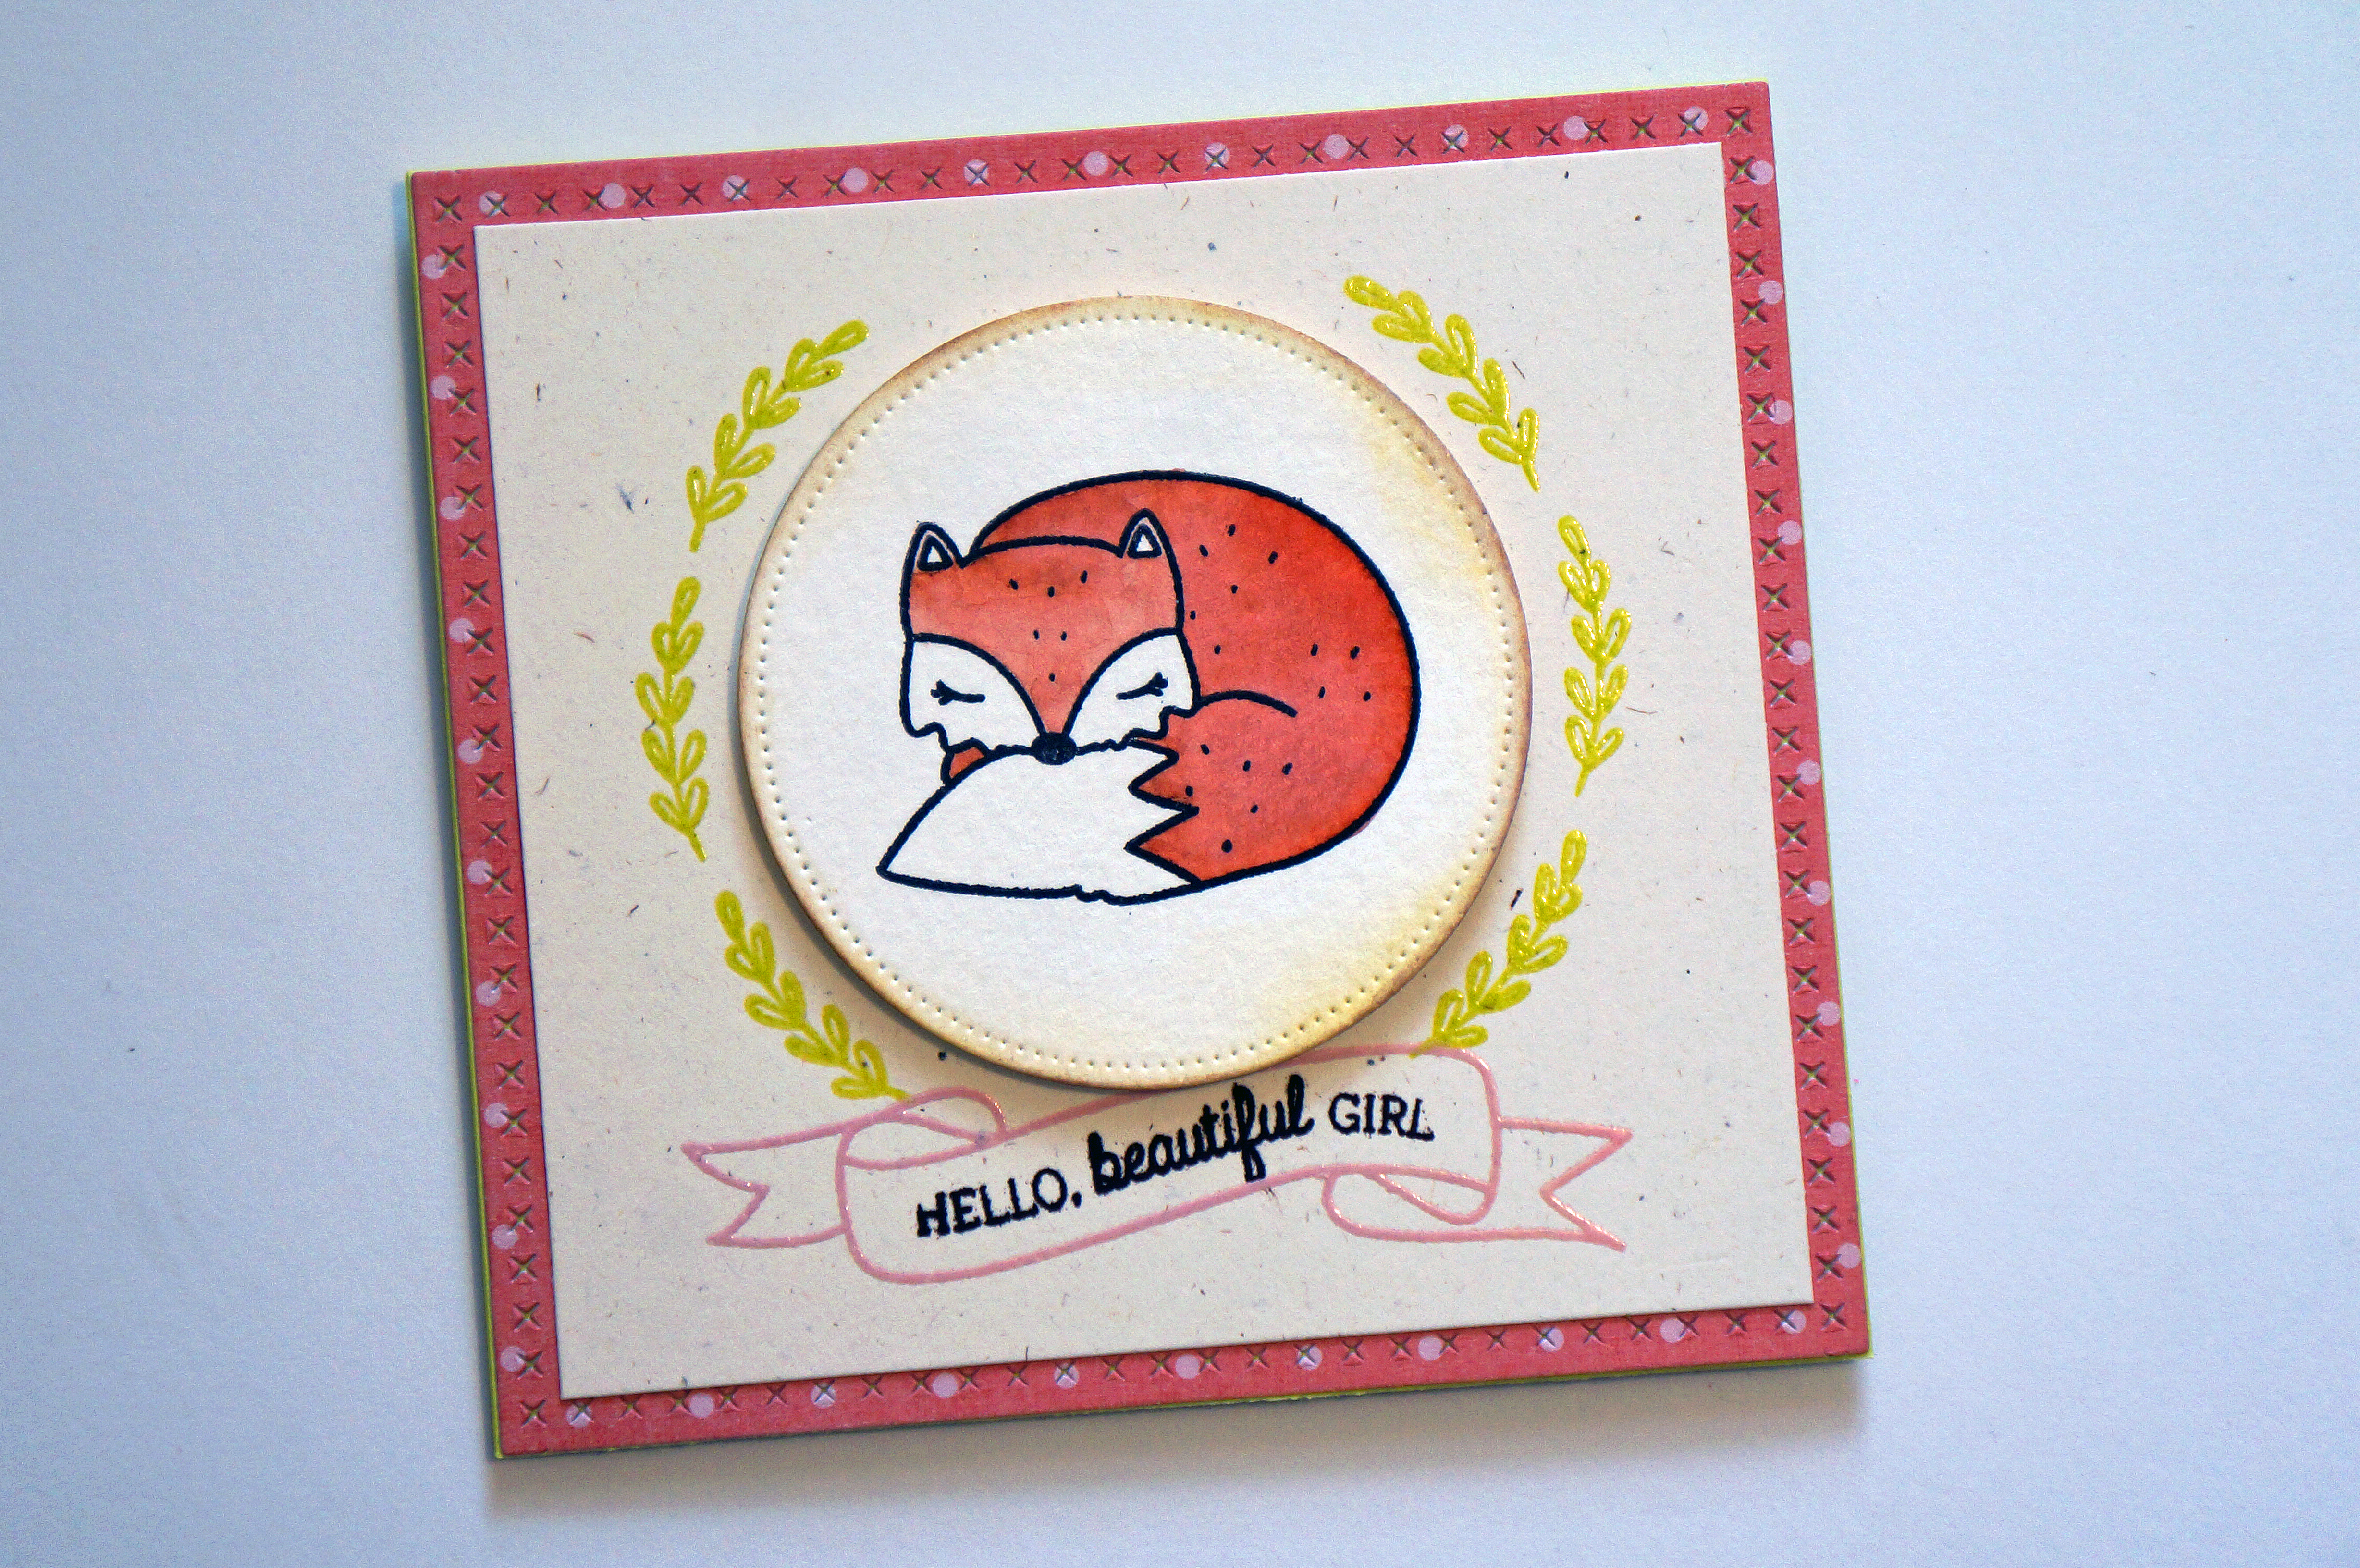
4. Zig Clean Color Real Brush MarkersJune Fave 4

According to my Instagram feed, everybody and their momma bought the Zig Clean Color Markers, and you know me… I had to get them also. I like to use these because they are easy to blend with, which comes in handy if you’re like me and can’t master Copics. If you’re waiting on a good deal to get these, you can get them from the Marker Supply website for half off.

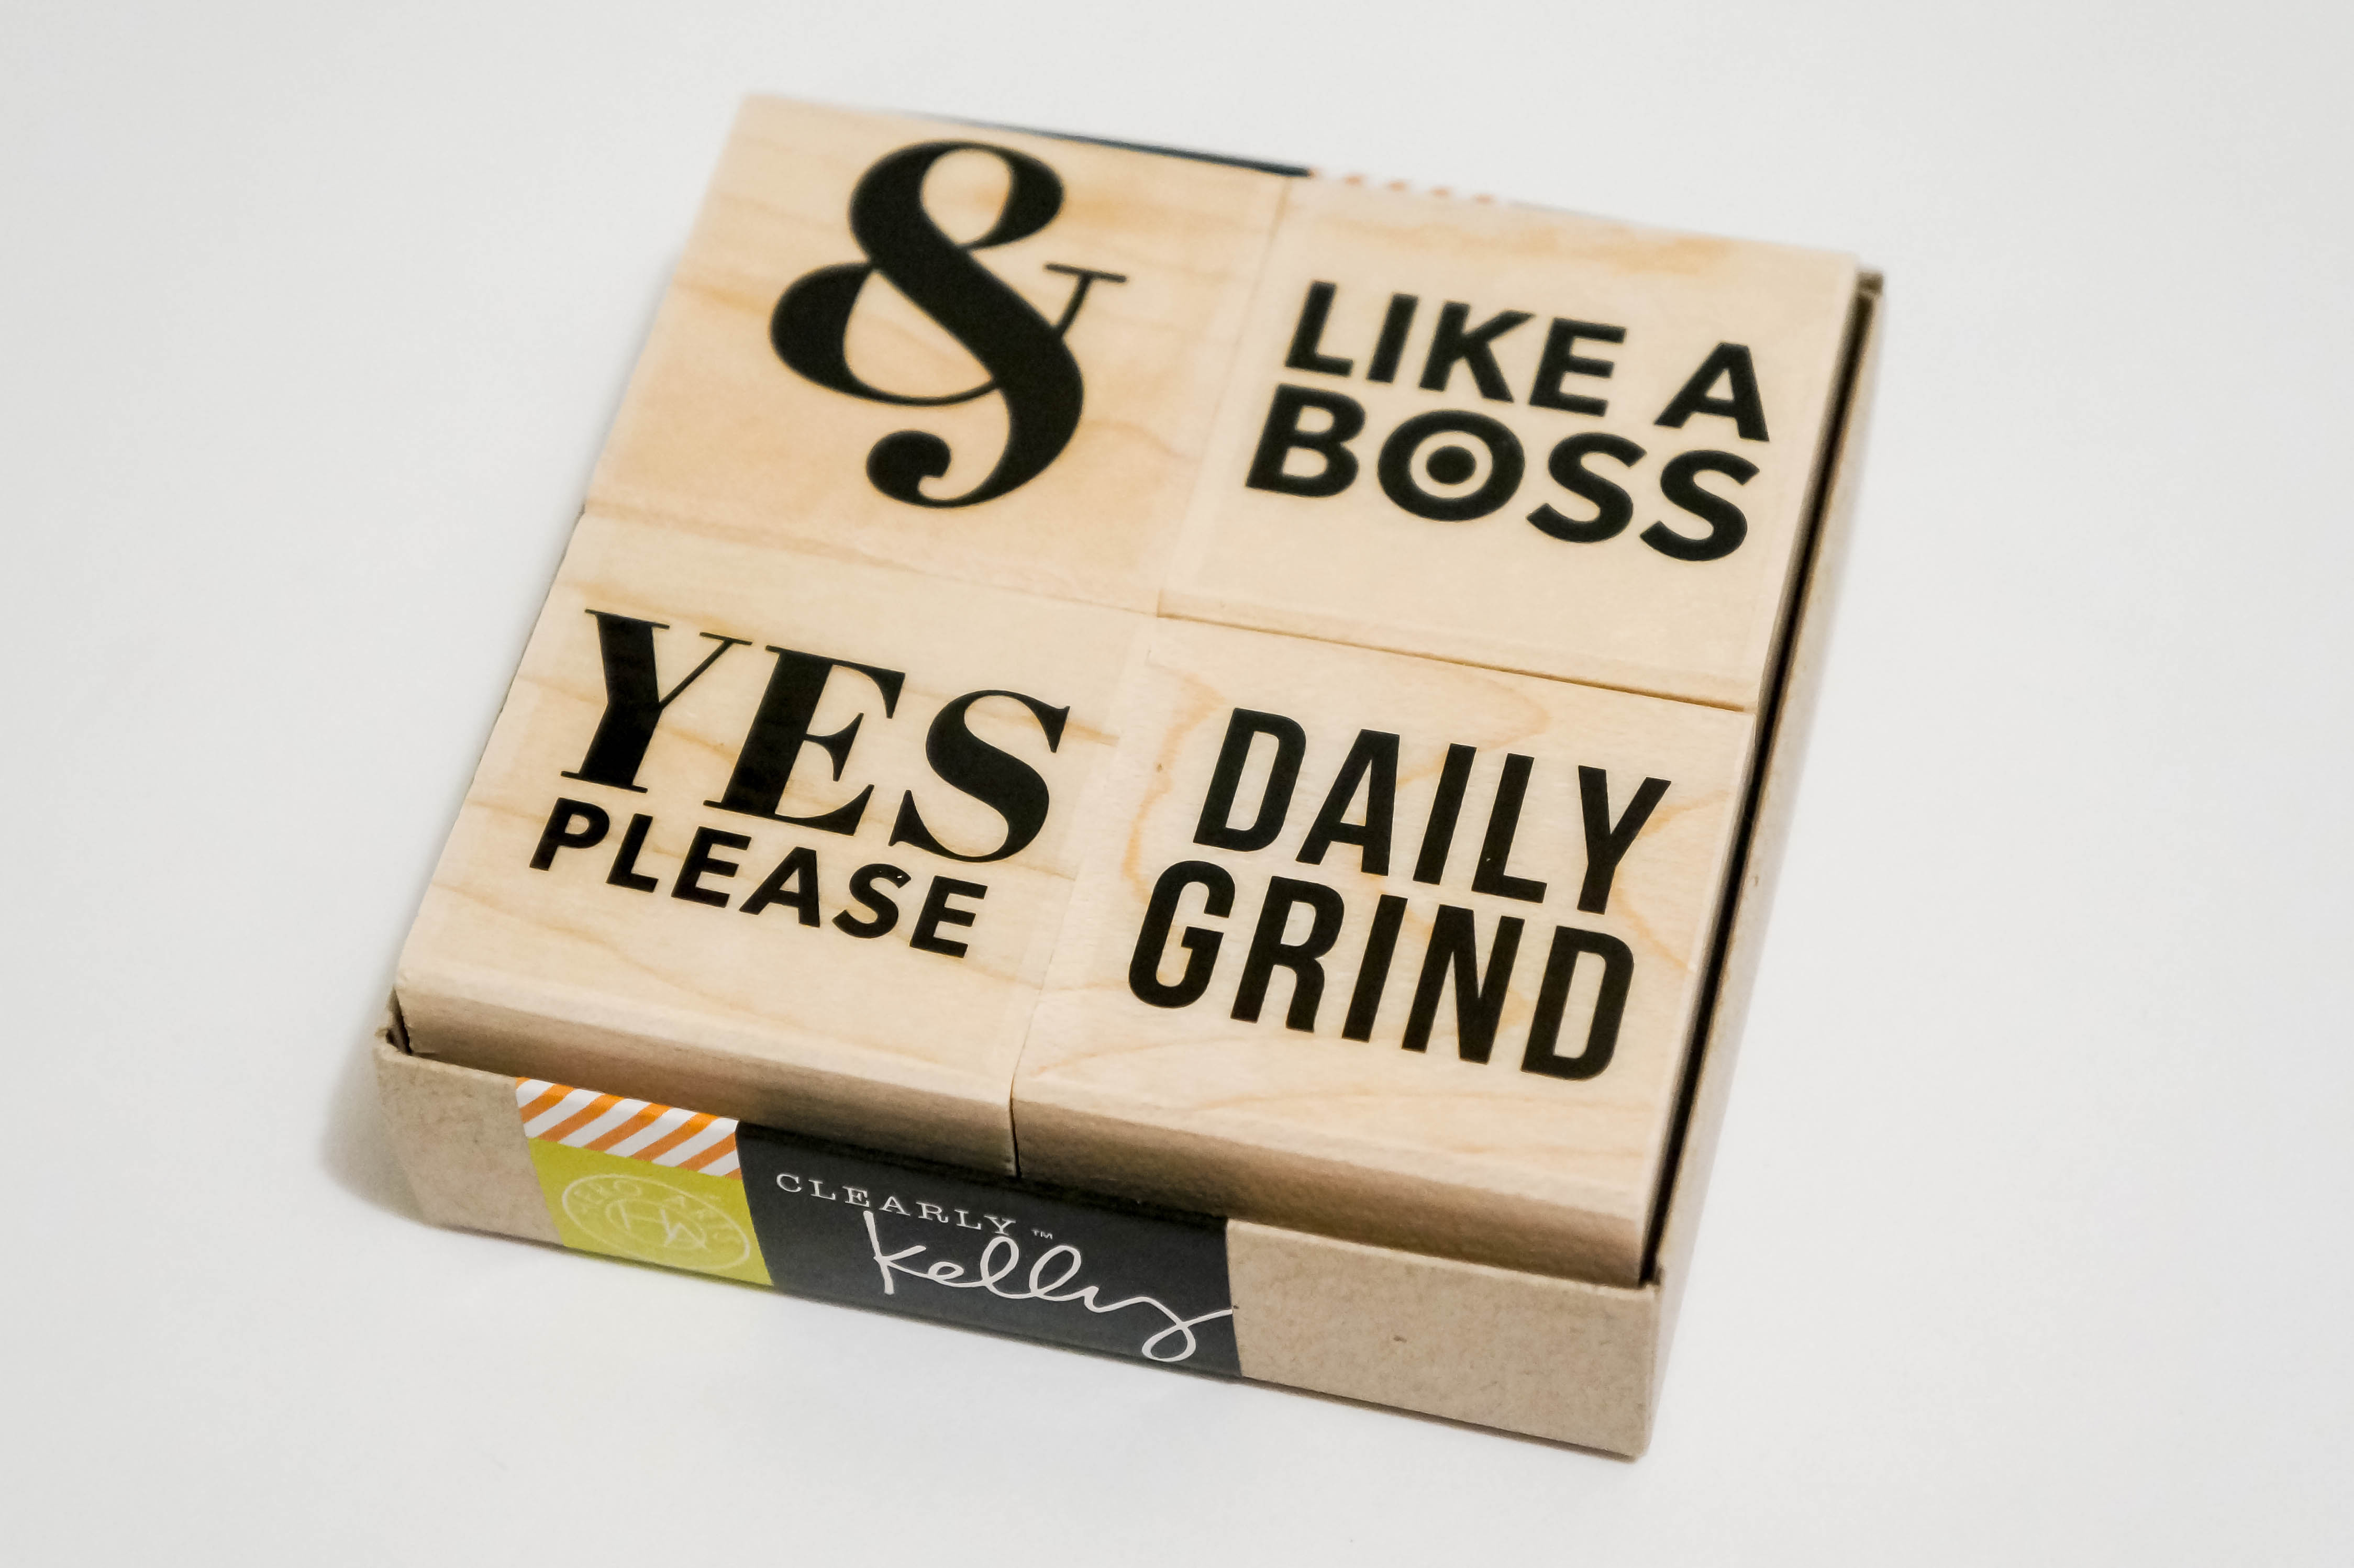
5. Hero Arts Kelly’s Yes Please Stamp SetJune Fave 5I love me a good small quote and especially now that I’m getting into Project Life. Then you mix it up with a wood mounted stamp? Even better. This stamp set is perfect to add that extra sass to your PL layouts! Now if only my boss would let me use these to stamp office documents… I just processed your invoice, like a boss!

I hope you guys enjoyed, I can’t wait to show you my newest Project Life layout on my next post. Make sure to stay tuned!!!

Items mentioned:

Link to HP Social Media Snapshots: http://store.hp.com/us/en/pdp/ink–toner—paper/hp-social-media-snapshots-removable-sticky-photo-paper-25-sht-4-x-5-in
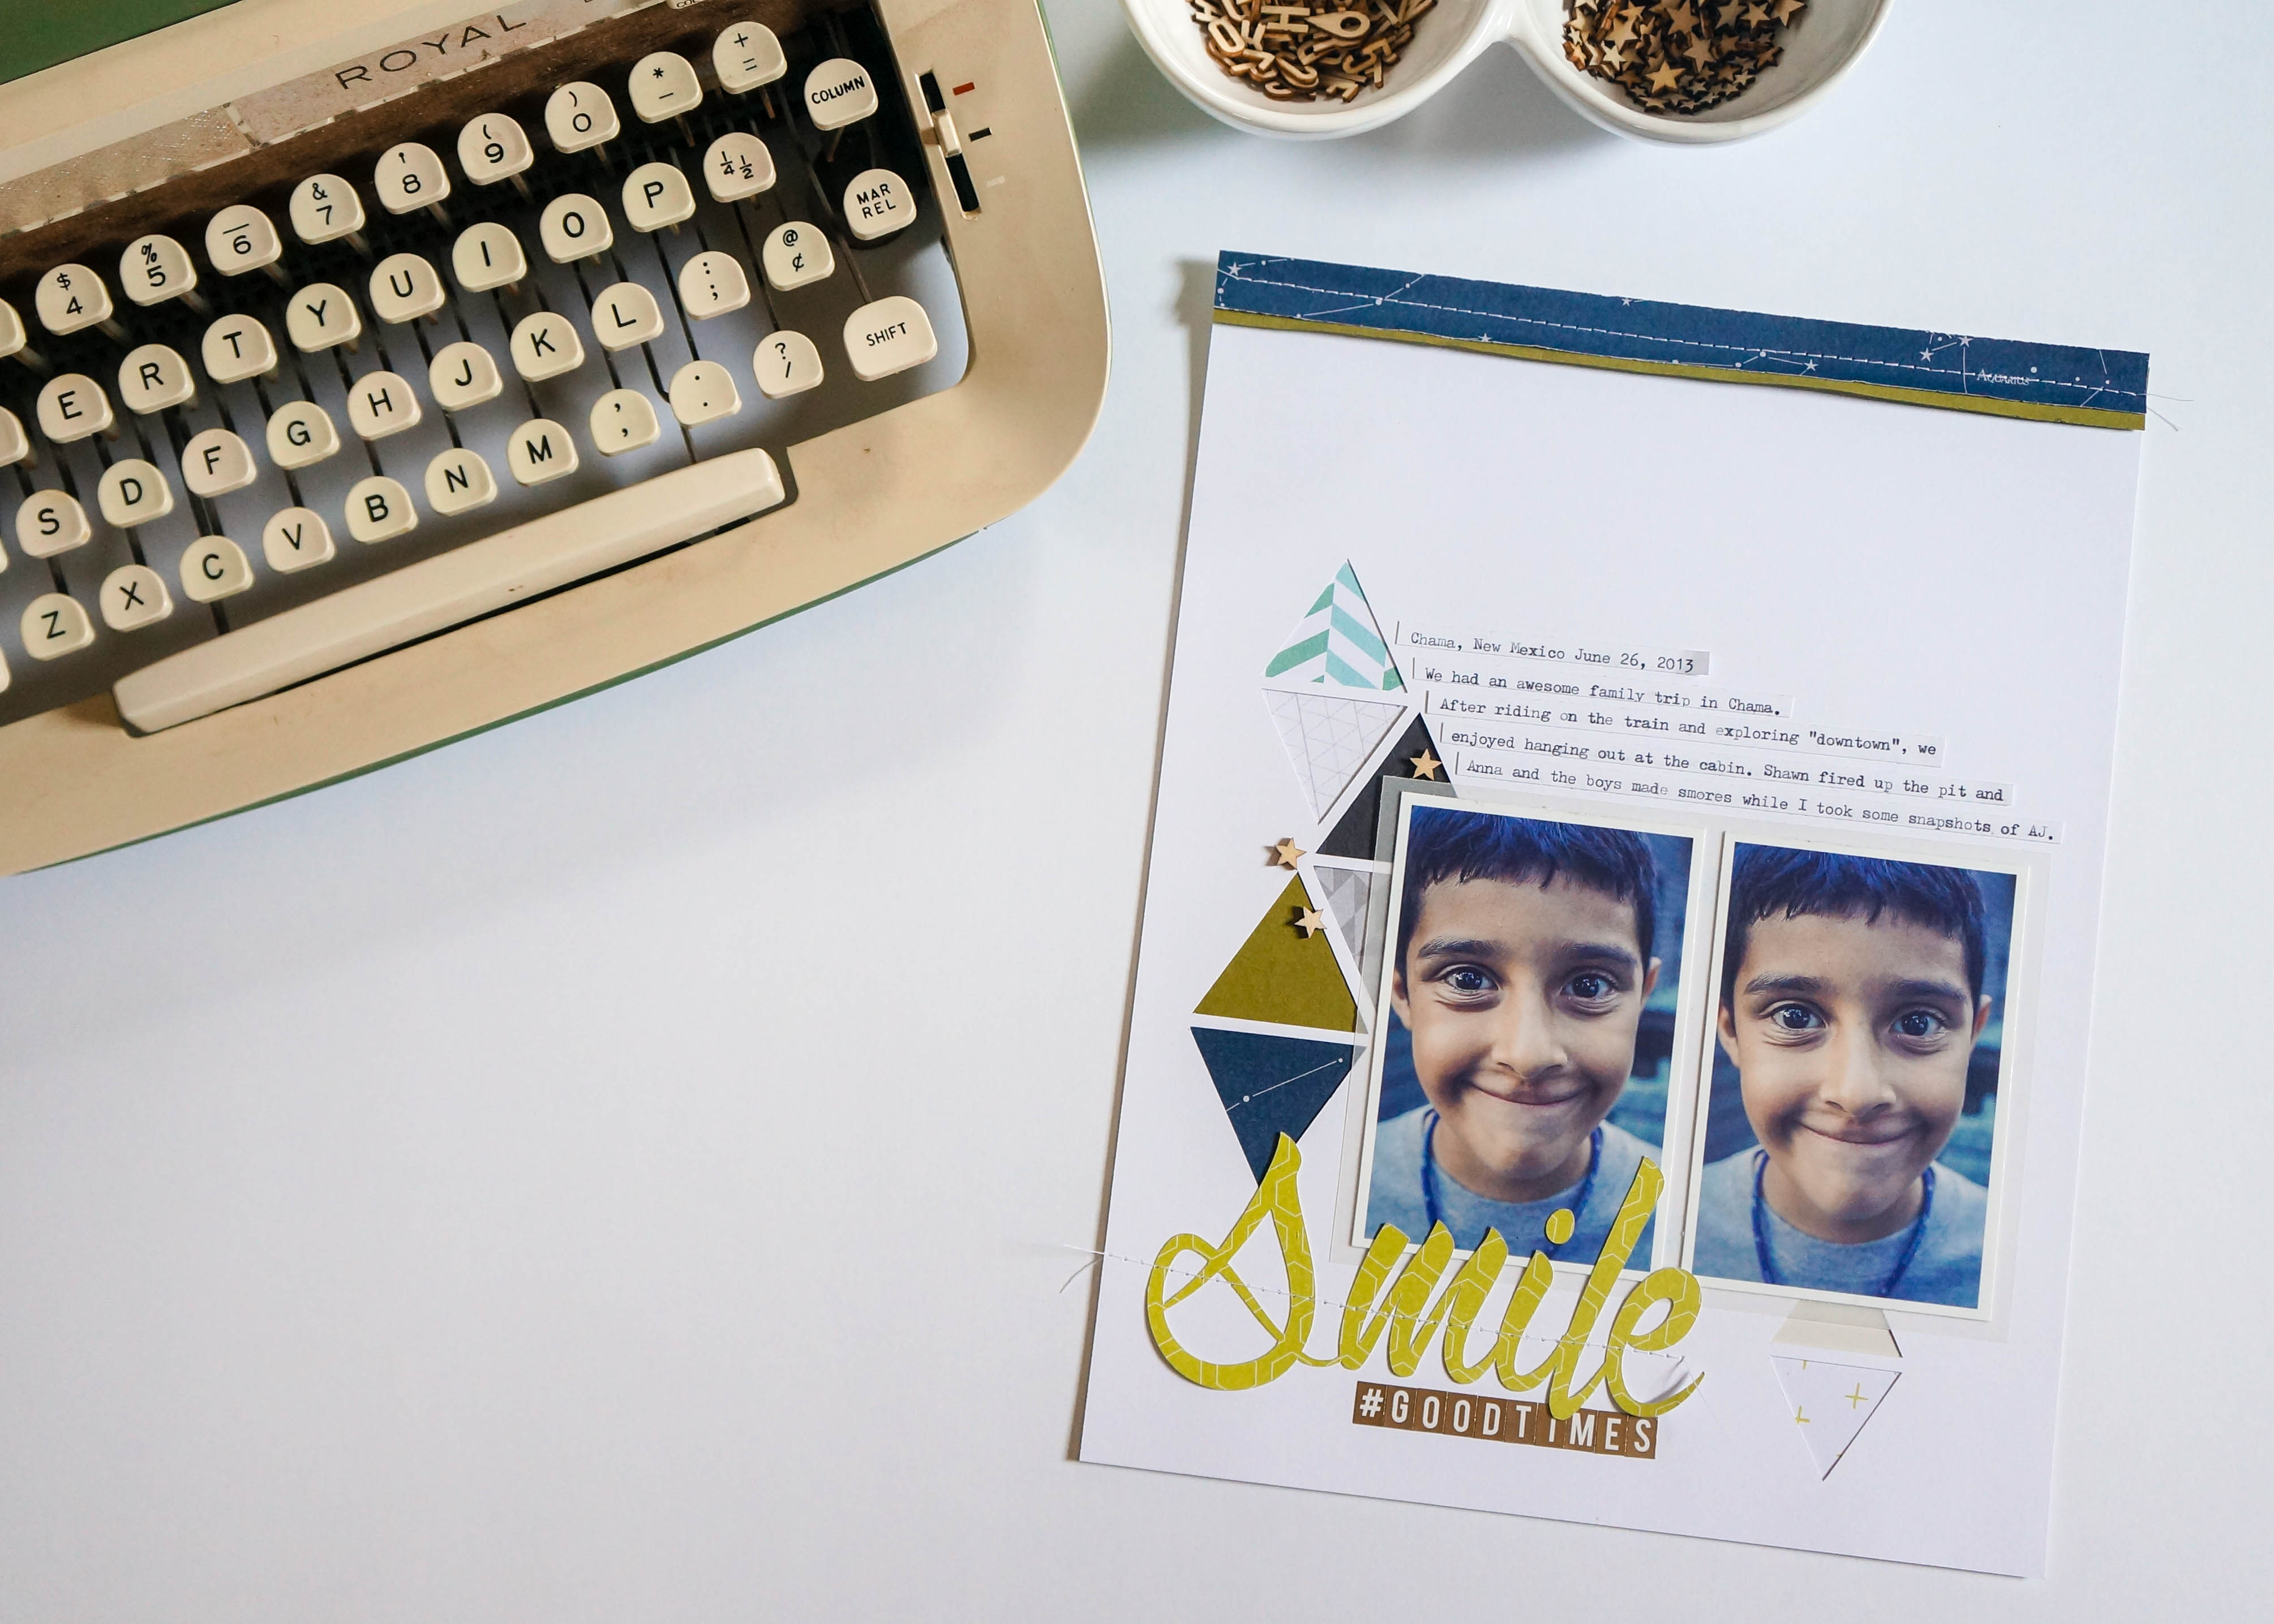
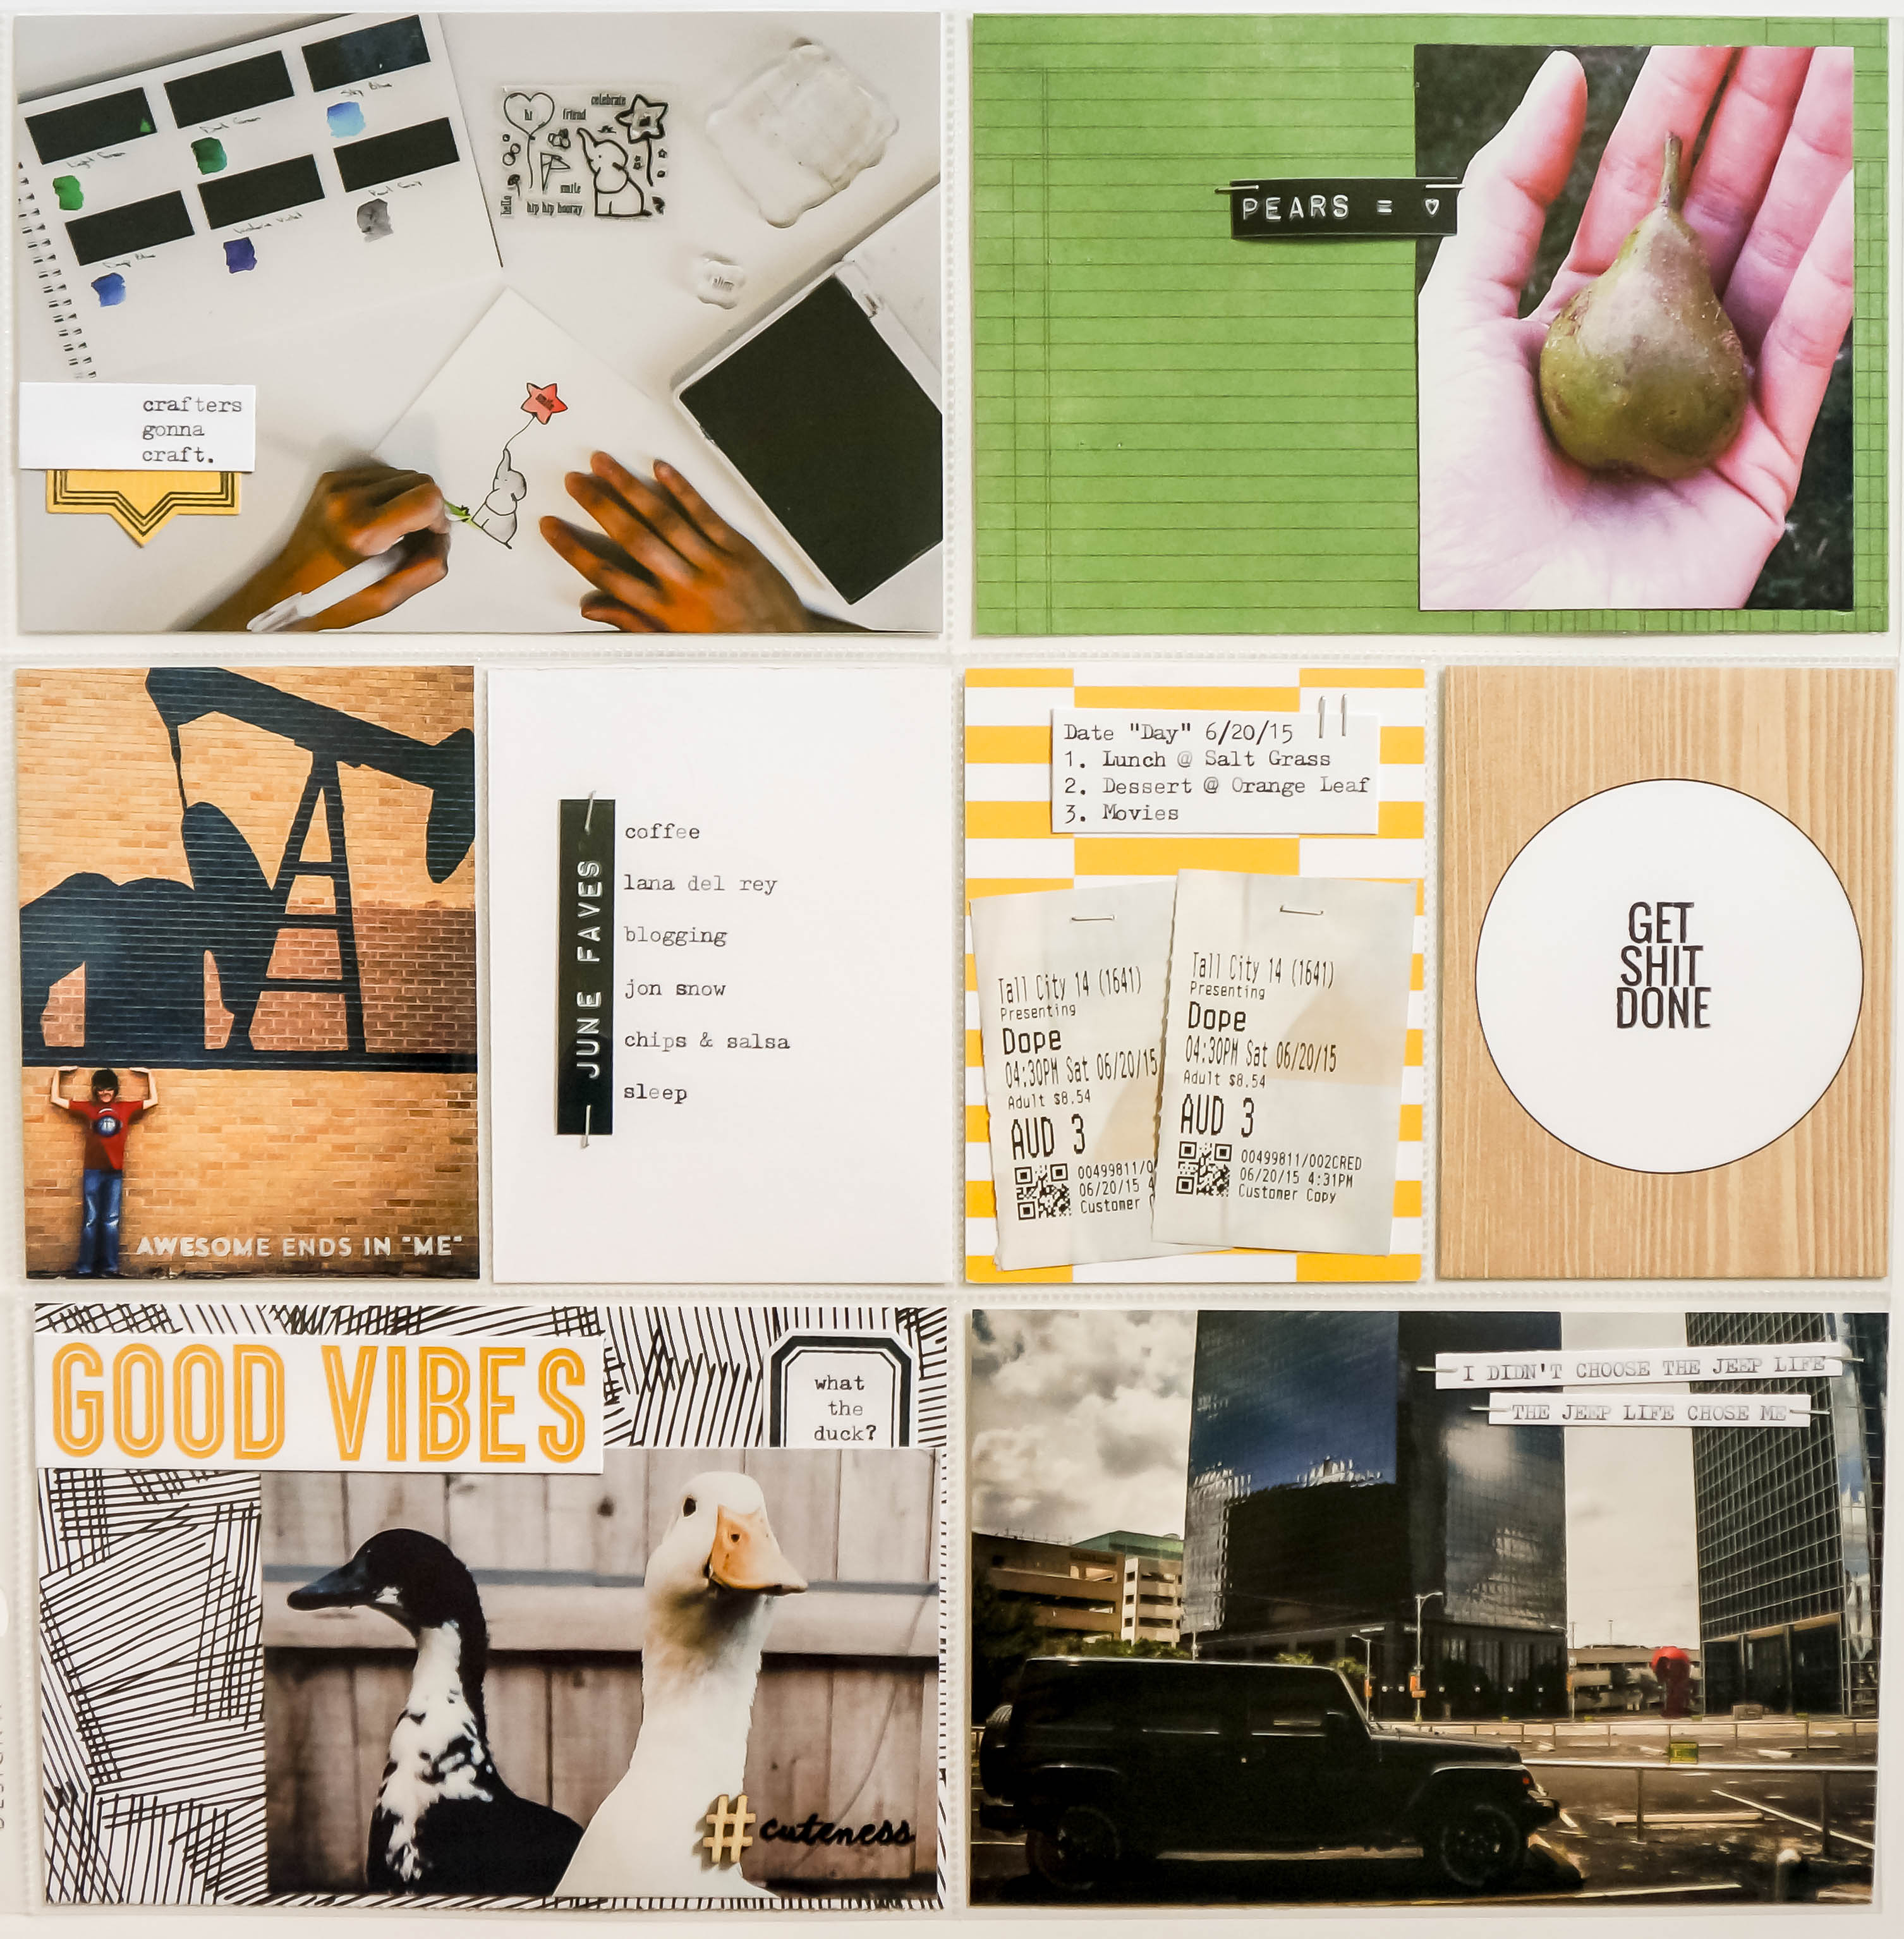
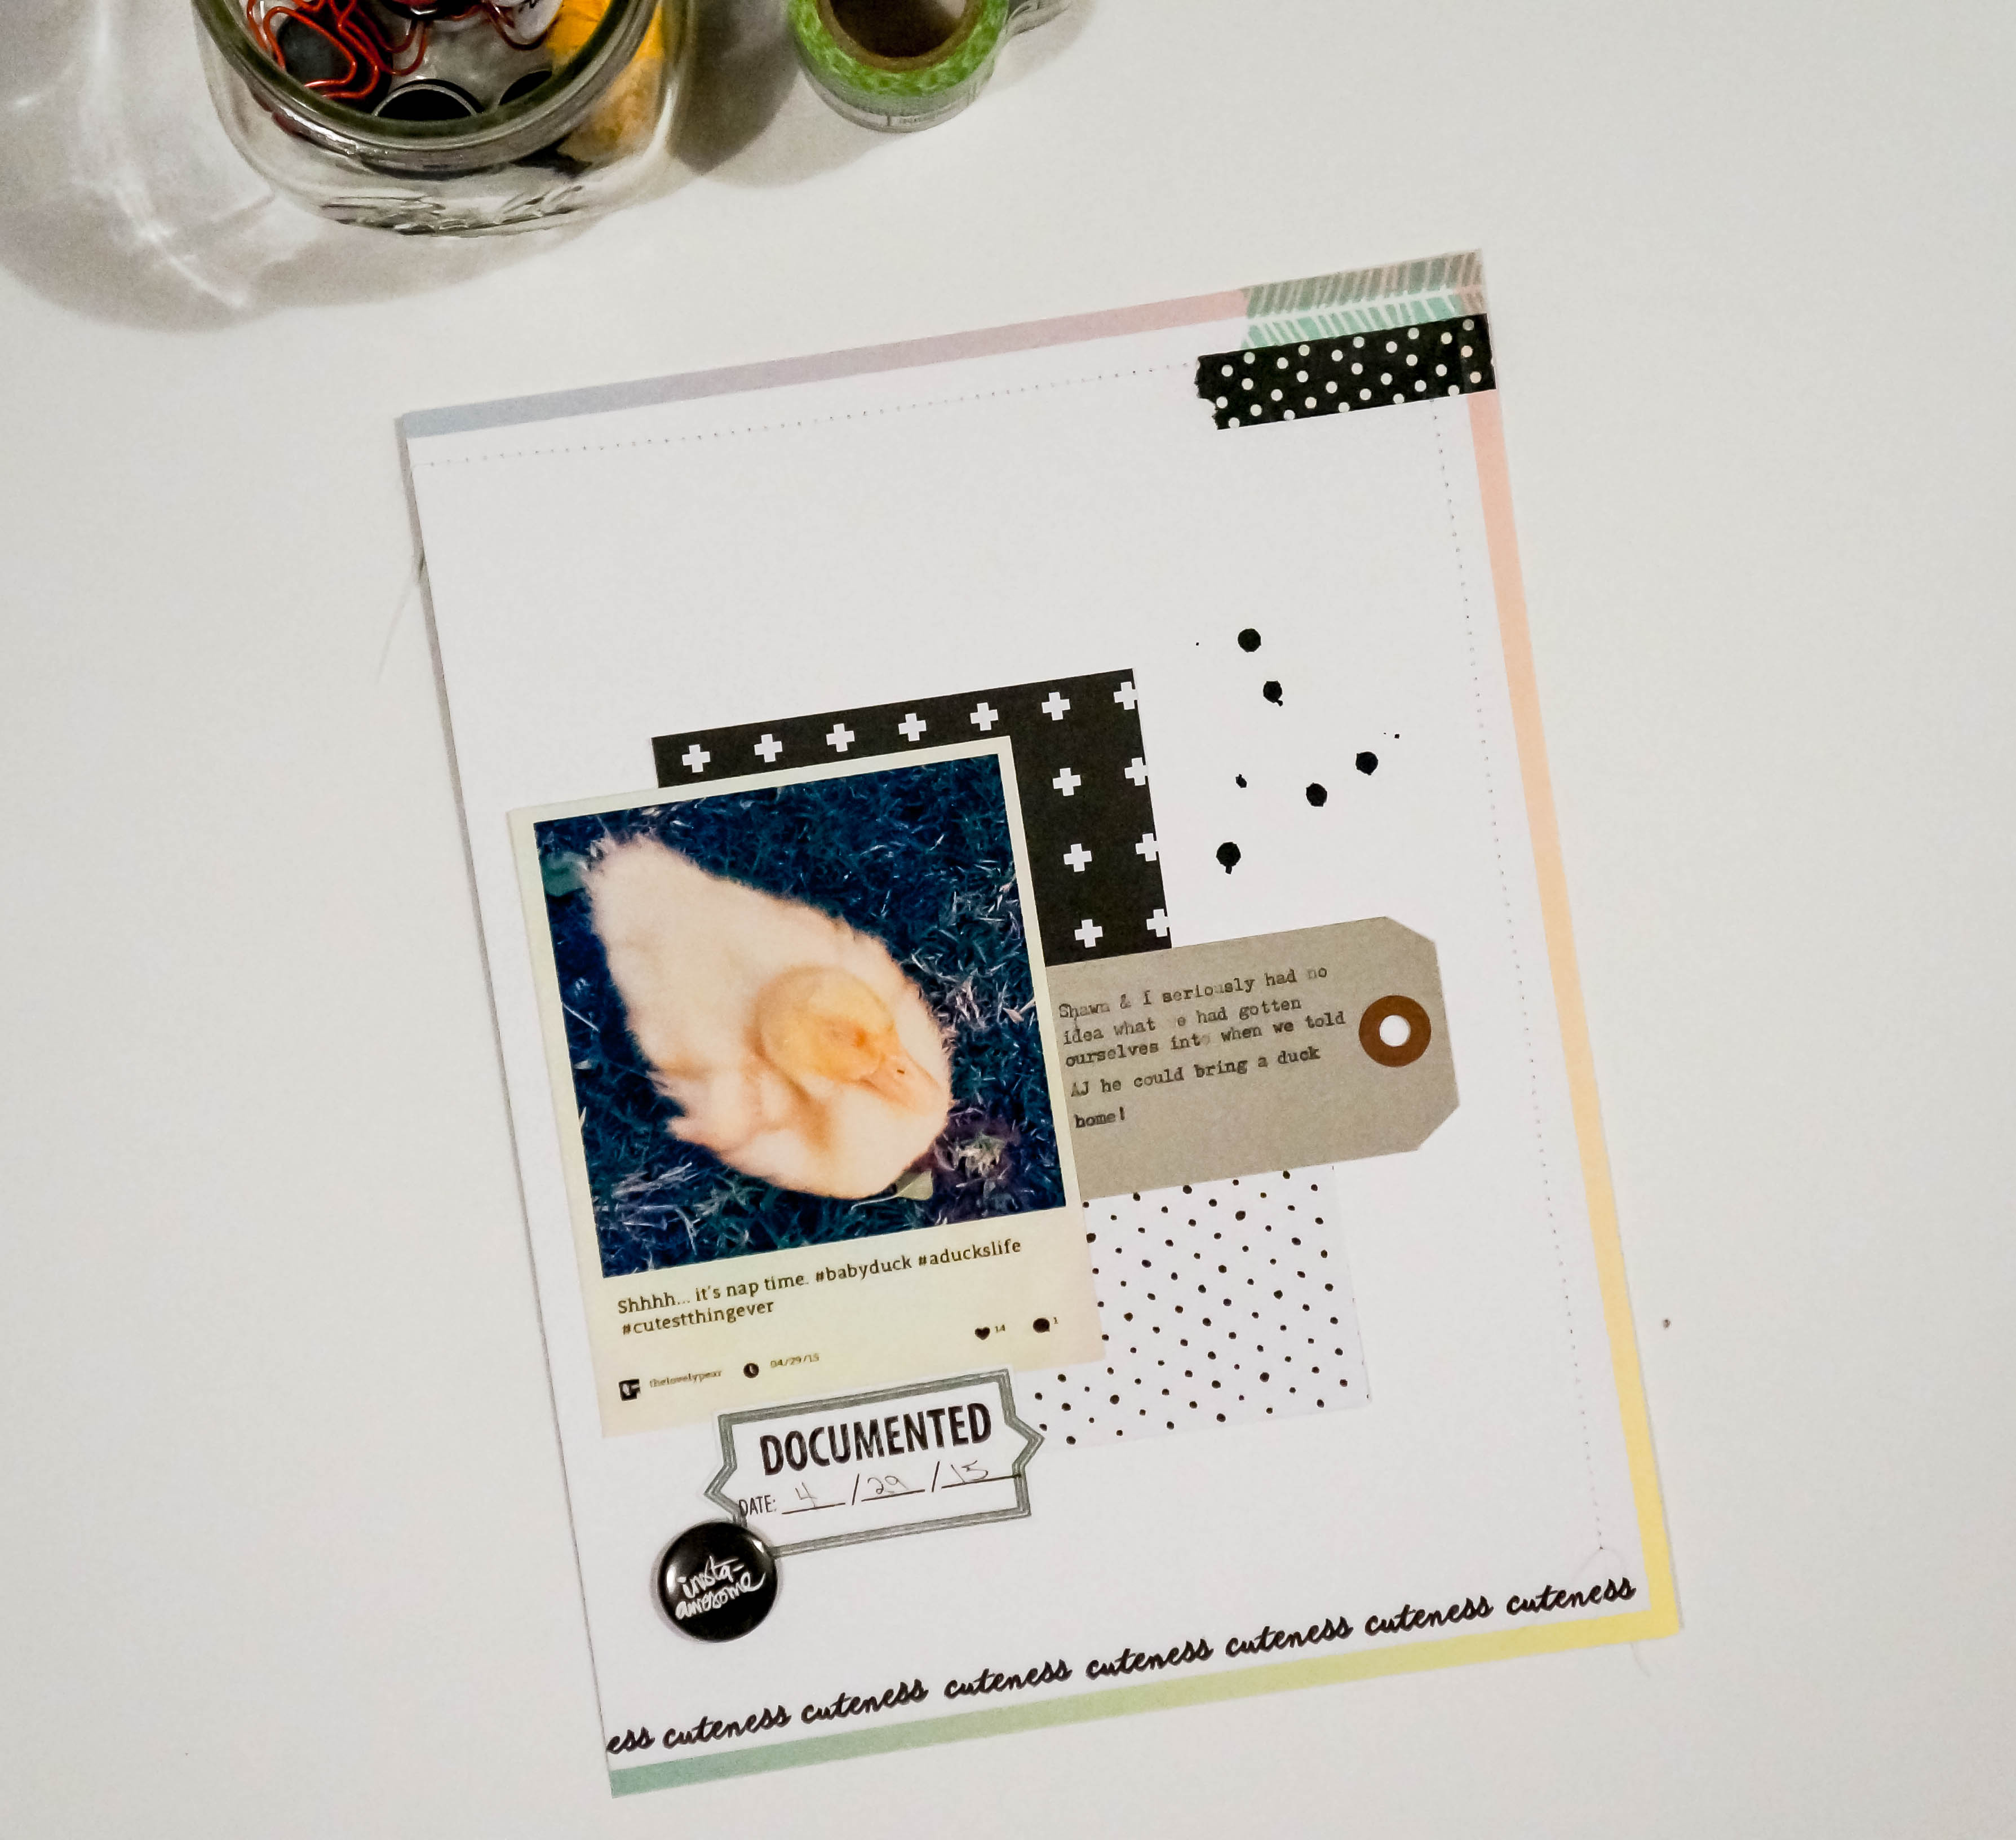
Card Making

Hello Beautiful Girl

Hi everybody! I have a couple of things to share today. First, I have decided to start a monthly Project Life album. I will be blogging my layouts and I’m really excited because I love photography and journaling. I haven’t done any journaling in years but I’m ready to get back into it, plus I get to do stamping on top of that! Taking random pictures and creating stuff on Photoshop is pretty much all I have done this past week and I am eagerly trying to put everything together. I’m starting off on a monthly basis (most people do weekly) because I know I tend to get overwhelmed and impatient easily so I figured a month gives me enough time to get my pictures and layout right. Can’t wait to share!!!

And now on to the next, I’d like to share my new card!

I just recently ordered Mama Elephant’s new Charmed stamp set and i wanted to watercolor the fox. I really didn’t know what type of card I was going to try to make or if I was even going to make one, I just really wanted to practice coloring with my Peerless watercolors. So I’m pretty much going to declare it now, Peerless is my favorite coloring medium! I would’ve never thought I’d like to watercolor, and I know I still need practice, but it’s now on my permanent stash. Also, Archival Ink, where have you been all my life? Best. Black Ink. Ever. (This is where I throw my imaginary mic down. Yeah, it’s that good!)

Hello Beautiful Girl 1 Hello Beautiful Girl 2

I colored my fox and die cut it using Mama Elephant’s Sew Fancy die set, it’s so fancy, you already know. (Sorry guys, I had a lot of coffee this morning!)Hello Beautiful Girl 3

I then got the bright idea to use the Freestyle Florals set because I needed a reason to use the Lemongrass ink pad. This just happens to be the best color ever!!! I’ve been stuck on black/gray since I could first see colors and then lemongrass was introduced into my life. I’m obsessed!

I decided to try to “age” the die-cut circle with my Vintage Photo distress ink by rubbing the edge with a blending tool. Definitely need to practice that technique some more.Hello Beautiful Girl 4

I added the ribbon with the Blush ink pad and heat embossed it and the leaves. I then stamped the sentiment with my PTI Dark Chocolate Brown ink pad. I made the card base out of PTI’s Limeade Ice cardstock because it matched really well with the Lemongrass leaves and I really like that pop of color when you open the card.Hello Beautiful Girl 5I love how this card came together at the end and I think this card would be an awesome baby shower card.

I would like to end by saying this card is dedicated to the fox my friend Angela ran over this past week. I like to believe all animals go to heaven (except for sharks)! (Ha ha, I just had to give her a hard time, she was really upset because it was a total accident.)

See you guys later!

Supplies used: